25 Cardboard Halloween Decorations DIY Ideas That Look Better Than a Shipping Box
Cardboard Halloween decorations DIY ideas can be surprisingly impressive when the material is treated as something to build with rather than simply something cheap to paint black.
That distinction matters. Cardboard is inexpensive, easy to find and simple to cut, but unfinished corrugated edges, visible box printing, weak joints and flat construction can quickly make a project look temporary. A little structure changes everything. Layering creates depth. Scoring produces cleaner folds. Internal braces make larger props stand properly. Paper strips can hide corrugated edges, while paint, distressing and textured finishes can make a delivery box resemble stone, aged timber or a vintage Halloween decoration.
The first decision is what type of cardboard you actually have. Thin cereal-box board is useful for detailed overlays, small silhouettes and curved forms. Standard shipping-box cardboard works well for signs, pumpkins, tombstones and medium-size structures. Thicker double-wall corrugated cardboard is much more useful for large haunted houses, coffins and freestanding props.
Where the decoration will be used matters too. Cardboard naturally performs best indoors. Outdoor cardboard Halloween decorations can work on a covered porch, sheltered entry or temporary dry-weather display, but ordinary cardboard should not be mistaken for a truly weatherproof material.
These 25 ideas deliberately range from quick beginner projects to larger structural builds so you can use cardboard for far more than simple cutout bats.
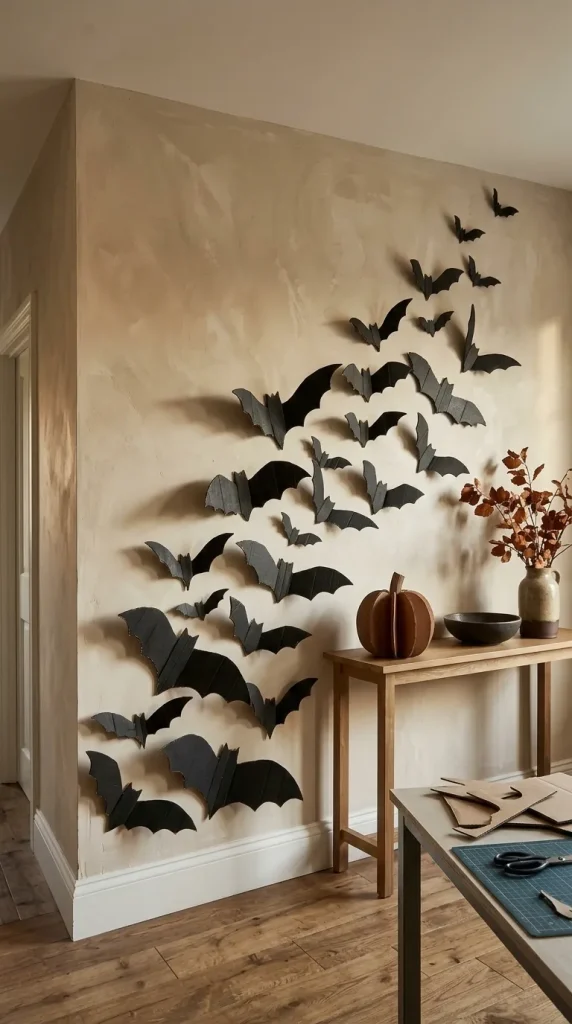
1. Make a Swarm of Layered Cardboard Bats
Cardboard bats are one of the easiest projects for beginners, but they look much better when you pay attention to scale and placement.
Cut several bat silhouettes in at least three sizes rather than making twenty identical shapes. Thin corrugated cardboard or recycled packaging board works well because the bats remain light enough for walls and doors.
For more dimension, score lightly where each wing meets the body and fold the wings forward slightly. Once mounted, the wings cast small shadows instead of sitting completely flat against the wall.
Paint them matte black so any printed packaging disappears. If the corrugated edges are visually distracting, run a thin strip of black paper around the most visible edges or simply paint the edges thoroughly.
Arrange the bats as a moving swarm. Start with larger shapes low on the wall and allow smaller bats to climb diagonally toward the ceiling or window. The composition will look more deliberate than evenly spacing them in rows.
This is an excellent bedroom, office or hallway project because it requires almost no floor space.
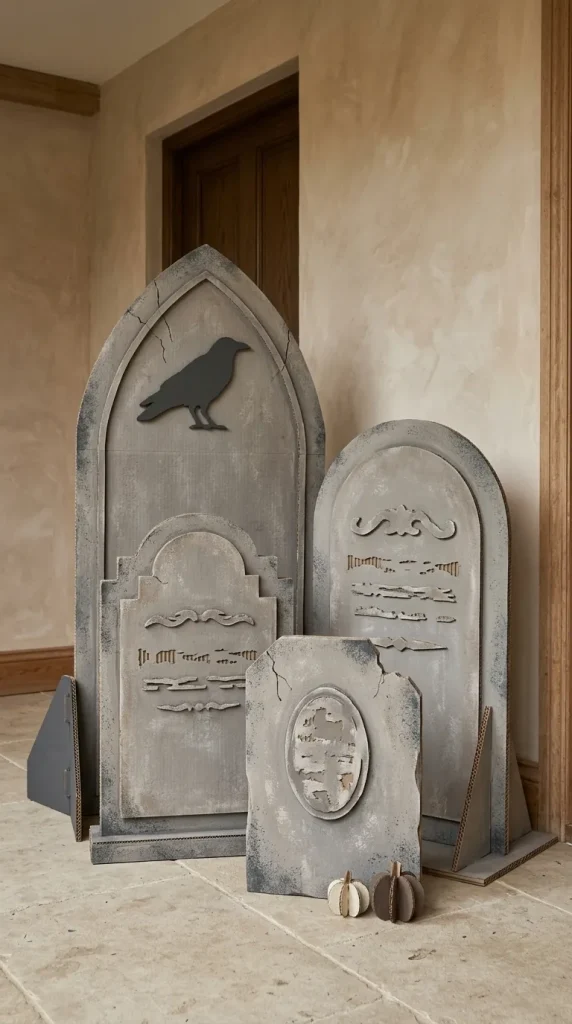
2. Build Faux-Stone Cardboard Tombstones
Tombstones show how much difference layering can make.
Start with strong corrugated board and cut the basic tombstone silhouette. Instead of stopping there, cut a second smaller shape and glue it to the front to create a raised stone border. Letters can be added with another thin cardboard layer.
Use grey paint in more than one tone. Start with a medium-grey base, stipple darker grey around corners and recesses, then dry-brush a lighter grey across raised areas. This makes the cardboard read more like aged stone.
Small cracks can be drawn or lightly scored into the surface before painting.
For freestanding tombstones, do not rely on the main panel alone. Add a wide folded cardboard foot at the rear or create triangular braces between the tombstone and base.
Indoors, they can last for several seasons if stored flat and dry. Outside, use them under a covered porch or for temporary dry-weather displays rather than assuming they can tolerate prolonged rain.

3. Create a Cardboard Jack-O’-Lantern Wall Decoration
A jack-o’-lantern does not need to be three-dimensional to create impact.
Cut a large pumpkin silhouette from flat cardboard and add a second layer around the perimeter to give the shape more depth. Then cut the facial features from the top layer rather than simply painting them on.
Paint the pumpkin in two or three orange values. Darker orange in the recessed sections and slightly lighter highlights on the raised areas can suggest pumpkin ribs.
For a nighttime effect, mount translucent orange or cream paper behind the face openings and position a battery-powered light safely behind the cardboard rather than placing an open flame anywhere near it.
This works particularly well on a wall, window or sheltered door.
A large graphic face will generally read better than complicated carving-style detail because thick corrugated cardboard is easier to cut cleanly in broad shapes.
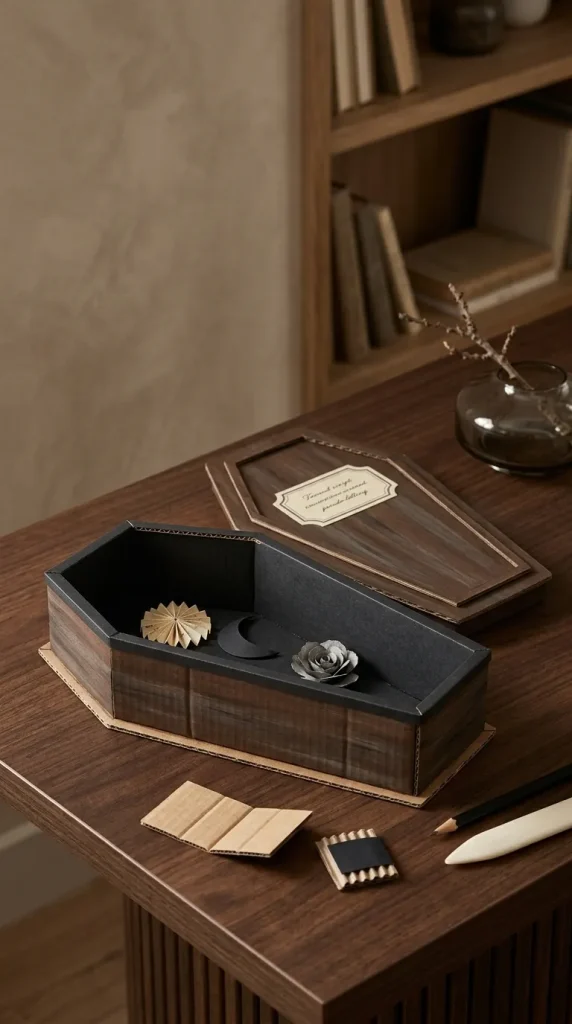
4. Make a Small Cardboard Coffin
A miniature coffin is a useful intermediate project because it introduces scoring, folding and dimensional construction without using large amounts of material.
Draw the coffin base first, then create a long side strip that wraps around the perimeter. Score the strip where each angle needs to bend rather than cutting it into many separate pieces.
Glue or tape the sidewall to the base, then cut a second coffin shape for the lid.
The styling can go in several directions. Paint it matte black with cream lettering for a graphic Halloween look, create a faux-wood finish with brown and grey dry brushing, or cover it with faded orange-and-black paper for a vintage aesthetic.
Use it as tabletop decor, a candy holder, a tiny vampire scene or a gothic display box.
Hide the exposed corrugated top edge of the sidewall with narrow paper or cardstock strips for a more finished appearance.
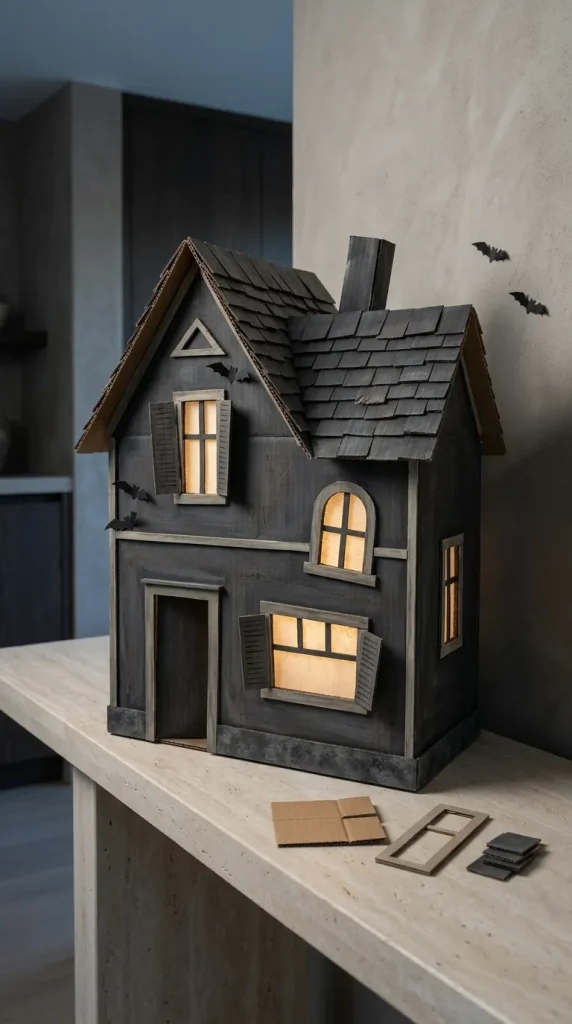
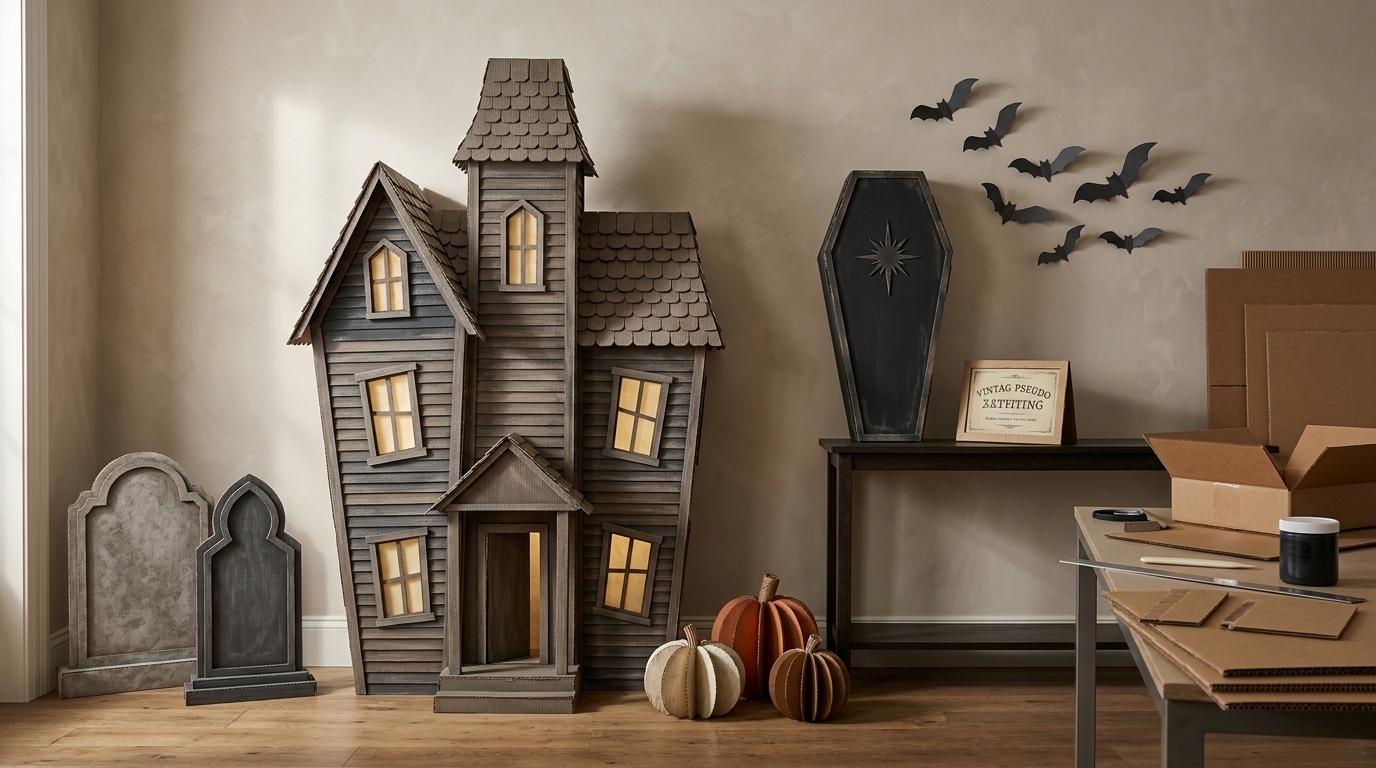
5. Turn a Shipping Box Into a Tabletop Haunted House
Boxes already give you walls, which makes them much more useful for architectural projects than flattened cardboard alone.
Choose a box in reasonably good condition and decide which side will become the front facade. Cut window and door openings before adding decorative layers.
Build the roof separately from folded corrugated cardboard, then add thinner cardboard window frames, shutters, roof trim and crooked architectural details.
Paint the entire box before adding the smallest details. Charcoal, faded black, weathered grey, deep brown and dirty cream create a convincing haunted-house palette.
Place translucent paper behind the window openings and use battery-powered lighting inside the empty box for a nighttime glow.
Do not worry about making every line perfectly straight. Slightly crooked rooflines and uneven shutters can reinforce the haunted aesthetic, as long as the construction itself remains controlled.
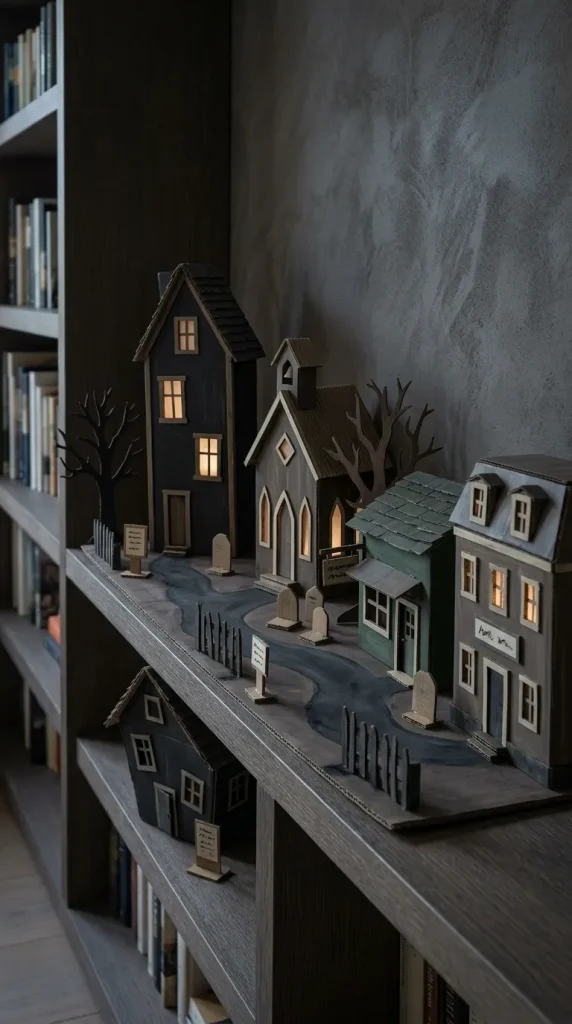
6. Create a Cardboard Halloween Village
A Halloween village is different from making one elaborate haunted house. The visual effect comes from several smaller structures working together.
Use cereal boxes, small packaging boxes and cardboard offcuts to create houses with different heights and rooflines. One might be a narrow haunted townhouse, another a witch’s shop, another a crooked chapel or miniature hotel.
Keep the palette connected across the village. Black, deep grey, faded orange and cream work well for a vintage display, while charcoal, dark green and brown create a moodier town.
Add tiny cardboard fences, bare trees, gravestones and signs between the buildings.
Vary the structures rather than repeating the same house shape. A convincing village needs changes in roof angle, height, window placement and facade width.
If you add lights, place small battery-powered lights behind translucent windows rather than trying to illuminate every building equally.
Display the finished town on a shelf, mantel, console or party table where it can be viewed as one complete scene.
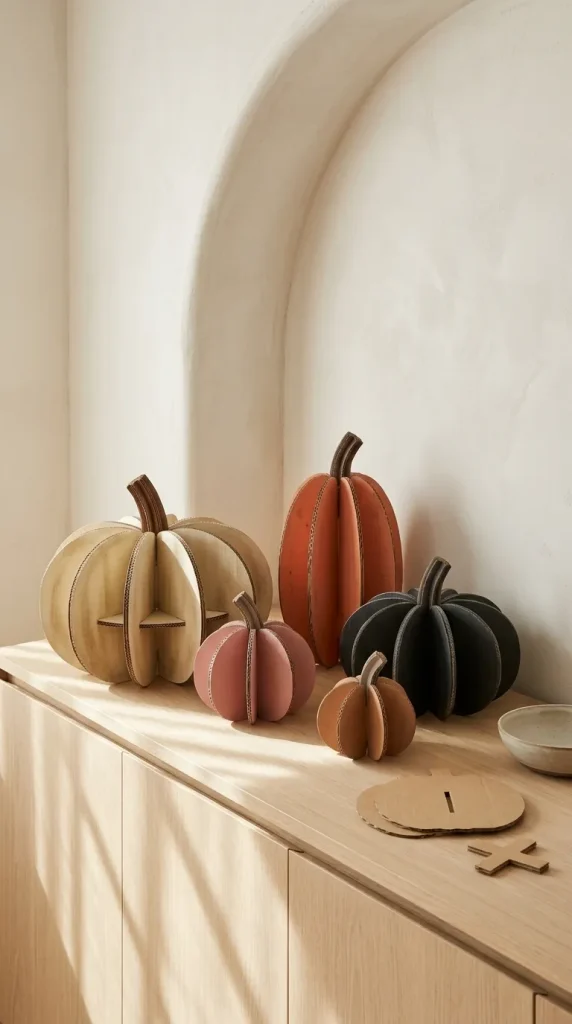
7. Make Ribbed 3D Cardboard Pumpkins
A layered cardboard pumpkin can look surprisingly sculptural.
Cut several identical pumpkin profiles, then create slots so the pieces interlock at right angles. Once assembled, the repeated profiles create a three-dimensional ribbed form.
Another method is to cut many vertical pumpkin slices and glue them around a central cardboard support.
Paint the edges as carefully as the faces because they become highly visible in this type of construction.
Traditional orange works, but cream, black, dusty pink or faded vintage orange can produce a more distinctive display.
For larger pumpkins, use thicker cardboard and add a central cross support so the structure does not twist.
Group several sizes together rather than making every pumpkin identical.
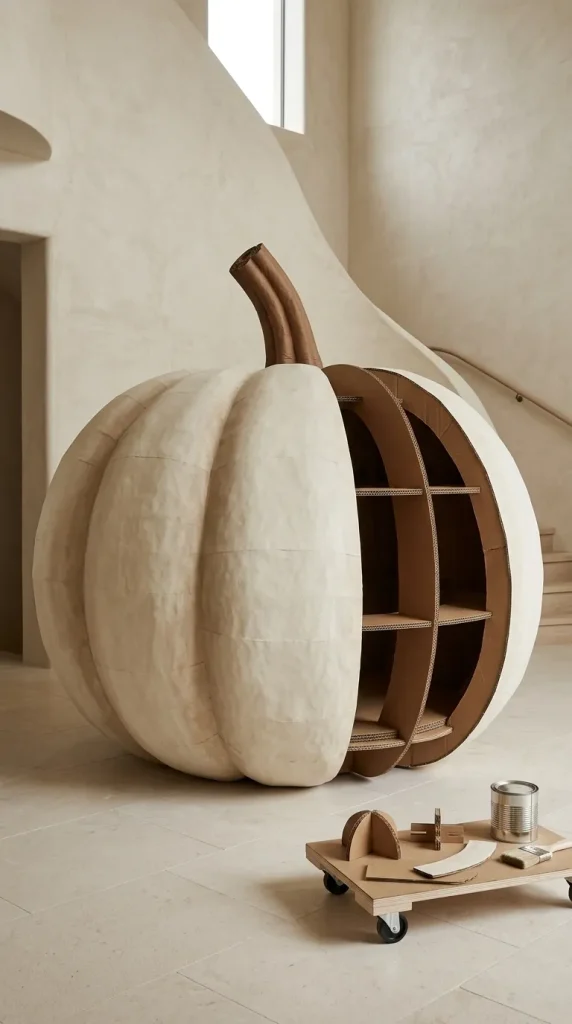
8. Build a Giant Cardboard Pumpkin Prop
An oversized pumpkin requires a different construction strategy from a tabletop craft.
Use multiple curved ribs attached to internal cross pieces to establish the form. Think of the inside as a lightweight skeleton rather than trying to bend one enormous sheet of cardboard into a pumpkin.
Add cardboard strips between the ribs if you want a more solid exterior, or cover the framework with paper and a light paper-mâché layer to soften the geometry.
The base should be wide enough that the pumpkin does not roll or lean. A hidden internal cardboard platform can help.
Large orange pumpkins work well for classic Halloween, but a giant black or cream pumpkin can look more contemporary.
Because of the size, the finish matters. Uneven paint can become much more obvious across a large surface, so work in broad sections and let each coat dry before adding shading.
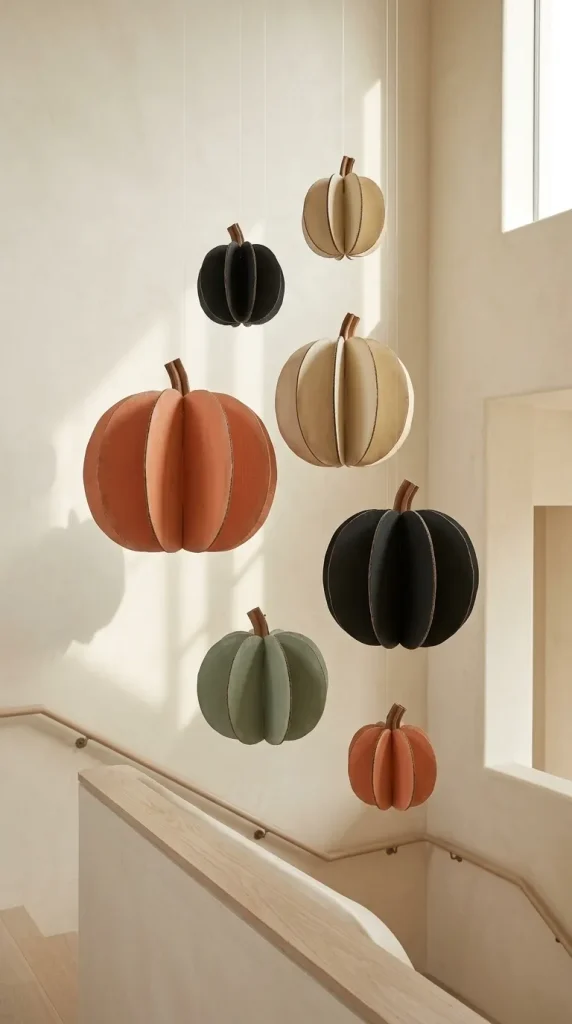
9. Make Hanging Cardboard Pumpkins
Hanging pumpkins create Halloween impact without using any table or floor space.
Cut two or more pumpkin silhouettes for each piece and slot them together so the decoration becomes dimensional when viewed from different angles.
Use lighter cardboard than you would for a freestanding prop. Heavy double-wall board is unnecessary and makes hanging more difficult.
Paint the pumpkins before final assembly so all surfaces are easier to reach.
For a playful display, vary the colours between orange, cream, black and muted green. For a vintage look, use faded orange and aged cream with hand-painted faces.
Hang them at different heights rather than in a perfectly level row.
Keep hanging pieces lightweight and clear of doors, fans, lighting and areas where people regularly walk.
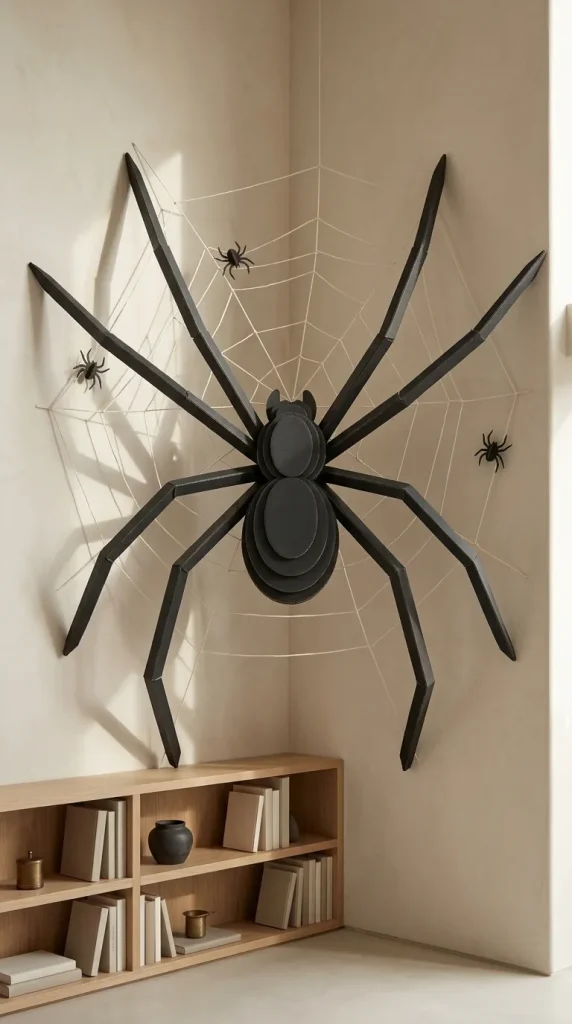
10. Turn Cardboard Into a Giant Spider
A large spider is a good example of how cardboard can create scale cheaply.
Build the body from layered oval pieces or a small box, then create eight legs from long folded strips. Folding each leg into an angled channel makes it much stiffer than leaving it as a flat strip.
For a scarier spider, paint everything matte black and exaggerate the leg length. For a family-friendly version, use rounded shapes, oversized eyes and colours such as purple, orange or pink.
The spider can be mounted across a wall corner, positioned above a door or suspended if the construction remains very light.
A giant spider does not need much surrounding decoration. One large web and a few smaller cardboard spiders are usually enough.
This is a good example of spending effort on one oversized focal prop rather than making dozens of small crafts.

11. Build a Haunted-House Door Facade
A door is ideal for cardboard because the surface supports the project and removes the need for freestanding stability.
Use large cardboard panels to create crooked planks, faux windows, roof shapes and boarded-up architectural details.
Do not simply cover the door with one flat sheet. Layer window frames, faux boards and trim so shadows create dimension.
A faux boarded window can be made from long strips painted like weathered timber. Score wood-grain lines before painting, then layer brown, charcoal and grey to create an aged effect.
Keep the handle, hinges and any necessary signage clear.
If you want a faster version, create only the upper haunted-house facade and let the existing door remain visible below.

12. Make a Giant Cardboard Monster Door
For something more playful, transform a door into a monster face.
Cardboard is especially useful for dimensional teeth, horns, eyebrows and eyes because these shapes can project beyond the flat door surface.
Use the doorway itself as the monster’s mouth. Teeth can frame the opening or sit around the perimeter of the door.
Green and purple create a cartoon-monster look, while black, grey and dark red can make the idea more sinister.
Large simple shapes work better than intricate facial detail. Viewers need to recognise the face from several steps away.
Layer the eyes or teeth with extra cardboard if you want them to cast stronger shadows.
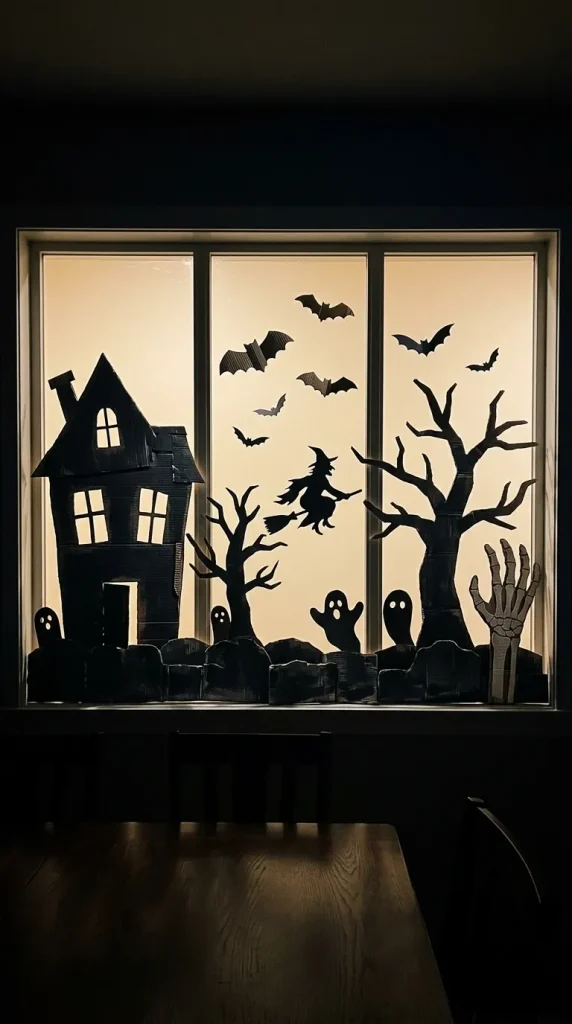
13. Cut Haunted Window Silhouettes
Windows are one of the best places to use flat cardboard.
Cut bold silhouettes of haunted houses, witches, bats, skeletal hands, ghosts or crooked trees and place them against illuminated glass.
At night, the contrast does most of the visual work, so complicated surface painting is unnecessary. Matte black is usually enough.
Keep the shapes large and readable. Tiny branches, fingers or decorative cuts are difficult to execute cleanly in thick corrugated board and may disappear when viewed from outside.
For finer details, combine corrugated cardboard for the main structure with black cardstock overlays.
A full haunted skyline across the bottom of a window can create more visual impact than isolated stickers spread over the glass.
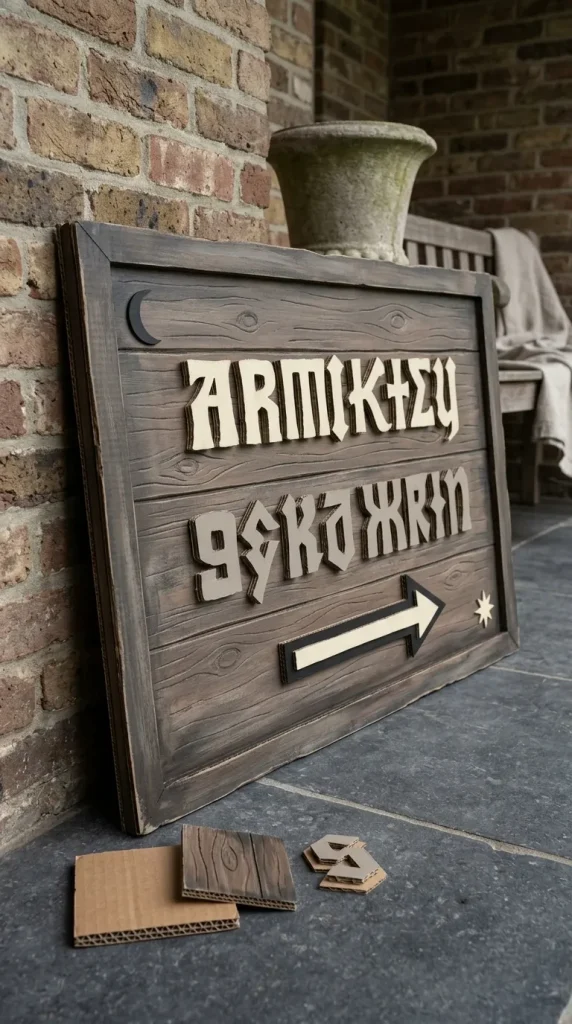
14. Build a Layered Cardboard Halloween Sign
Cardboard signs can look much more convincing when they are constructed like real objects rather than simply painted rectangles.
Start with a strong backing shape. Add a second cardboard layer around the edge to create a frame and cut separate letters rather than painting all the wording flat.
For faux wood, score plank lines into the board and use several brown and grey paint tones. For a graveyard sign, use stone-grey paint and irregular chipped-looking edges.
Possible signs include haunted-house directions, graveyard warnings, witch-shop labels or fictional carnival notices.
Keep lettering relatively large because Halloween signs often need to be readable from across a room or yard.
Seal or cover exposed corrugated edges if you want a more polished finish.
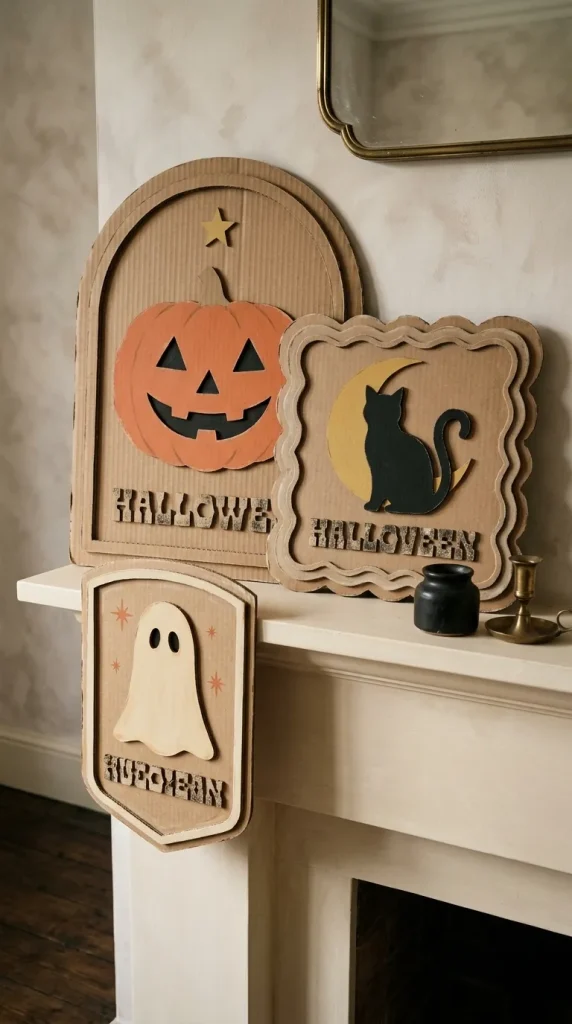
15. Create a Vintage Cardboard Halloween Sign Collection
Vintage Halloween suits cardboard particularly well because slight imperfections can work in its favour.
Cut pumpkin, moon, cat and ghost shapes, then use faded orange, cream, black and muted yellow rather than highly saturated modern colours.
Add aged-looking lettering and gently distressed edges. Do not distress every inch equally; concentrate wear around corners and raised areas where age would visually make sense.
Mount the graphics on layered cardboard plaques or faux frames.
A small collection of three coordinated signs can look stronger than one overloaded piece.
Use the same limited palette and lettering style across the set so it feels like a deliberate vintage collection.
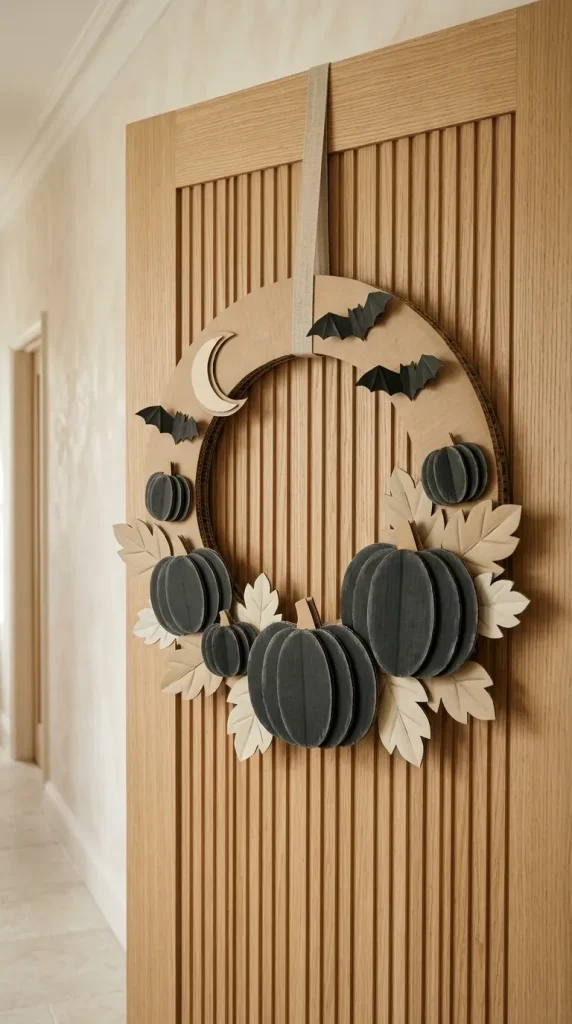
16. Make a Cardboard Pumpkin Wreath
A wreath does not need a thick floral base.
Cut a large cardboard ring and reinforce it with a second identical layer. Then add layered cardboard pumpkins, leaves, bats or lettering around the face.
Keep heavier decorative pieces near the lower portion of the ring so the wreath hangs more naturally.
For a traditional design, use orange pumpkins and black bats. A vintage version could use faded cream and orange. A modern version might use matte black pumpkins with warm beige or cream details.
Hide the visible ring with paint, paper or overlapping decorative layers.
Because the entire piece remains lightweight, it works well on interior doors and sheltered entrances.
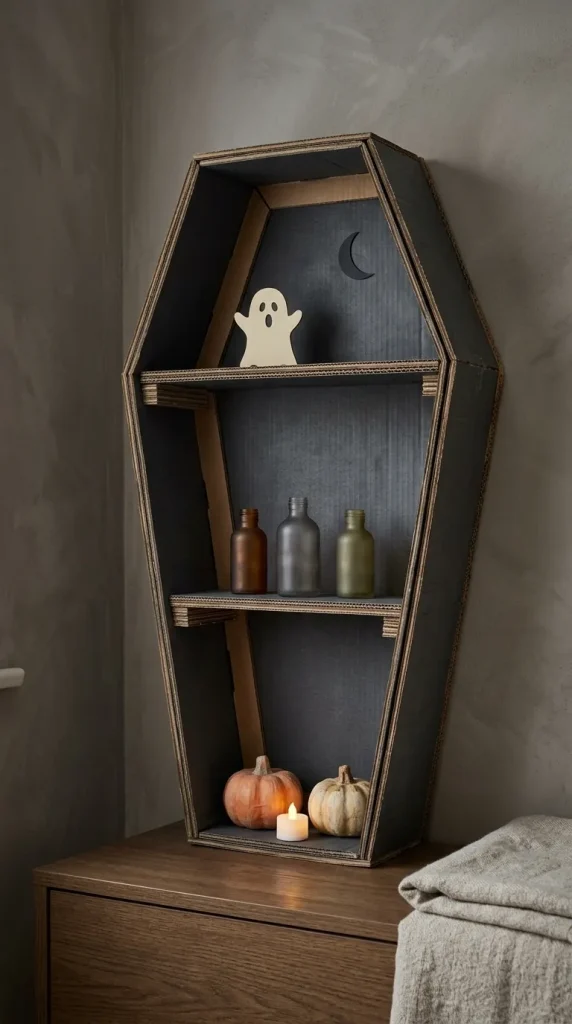
17. Build a Cardboard Coffin Shelf Display
A larger coffin can become more than a freestanding prop.
Construct a shallow coffin-shaped box and add one or two internal horizontal dividers so it functions as a decorative display case.
The shelves can hold small pumpkins, potion bottles, faux candles or miniature ghosts.
Use doubled cardboard for the outer frame because the structure needs to remain straight. Add internal strips along the back corners to prevent the sides from flexing.
Paint it matte black for a gothic look or use faux weathered wood for something more theatrical.
Because this is cardboard, keep the displayed objects lightweight rather than treating it like permanent shelving.
Mounted securely against a wall or placed on a stable surface, it can create strong vertical Halloween decor indoors.
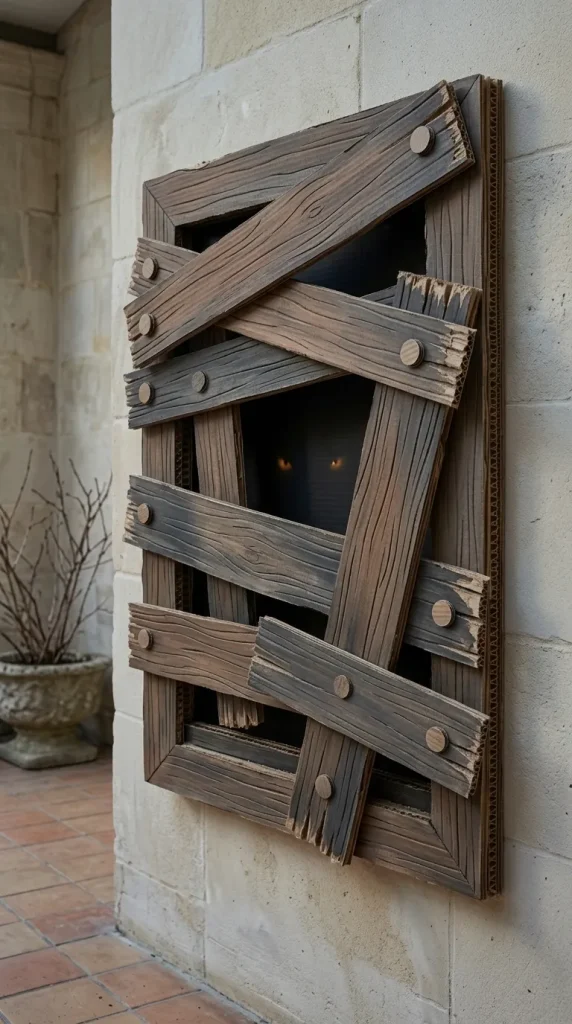
18. Create a Faux Boarded-Up Window Prop
A boarded window is one of the easiest ways to make cardboard resemble another material.
Cut a large dark rectangle for the background and several long irregular strips for the faux boards.
Score grain lines into each strip before painting. Start with brown, then layer dark grey and lighter dry brushing so the planks appear aged rather than uniformly brown.
Place the boards diagonally across the dark opening and add cardboard nail-head circles or dark painted marks.
A pair of glowing or painted eyes can appear behind the gaps for a stronger Halloween effect.
This works well on interior walls, doors or sheltered exterior walls because the visual illusion is clear from a distance.
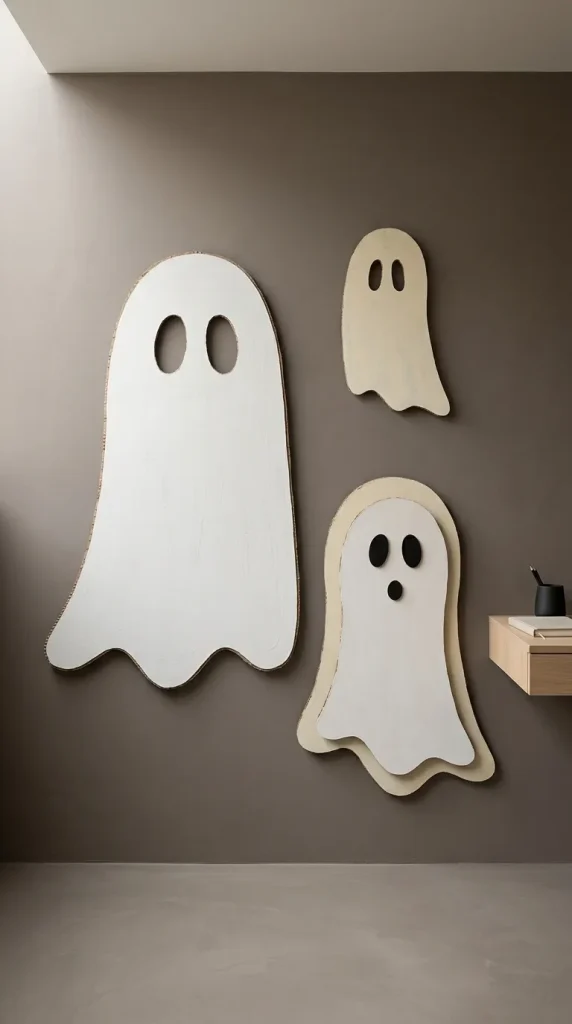
19. Make a Cardboard Ghost Wall Silhouette
Not every cardboard project needs complicated construction.
Cut one oversized ghost silhouette from sturdy board and use it as a graphic wall decoration.
For a classic ghost, paint the surface warm white and add simple black features. For a more modern design, leave some areas cut out so the wall colour shows through.
Layer a second smaller ghost shape on top if you want dimension.
A group of three different-scale ghosts can create a stronger composition than one small craft.
Because the shape is large, keep it visually simple. Overly detailed facial features can weaken the bold silhouette.
This is especially effective in bedrooms, offices and hallways.
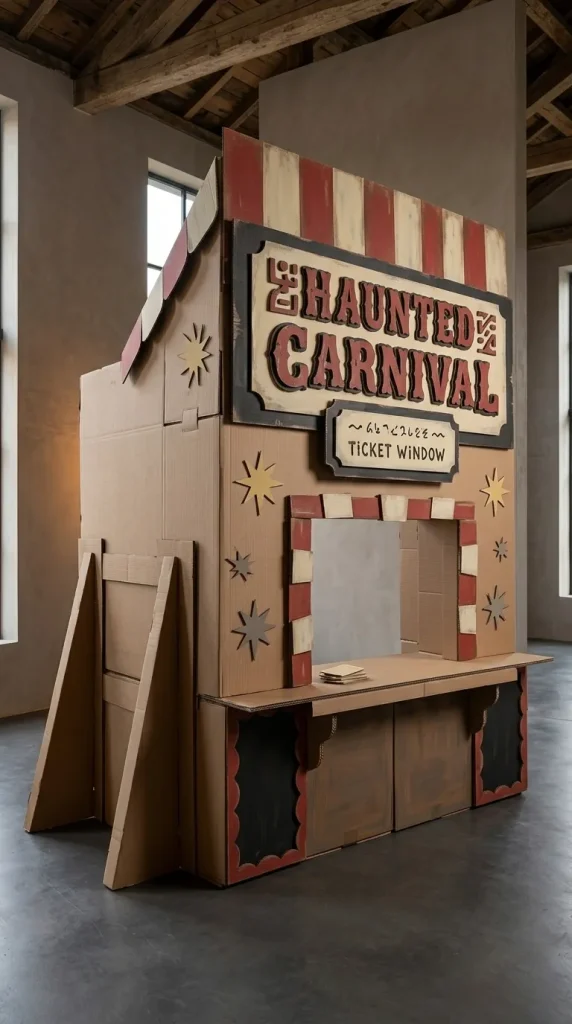
20. Build a Haunted Carnival Stall From Boxes
For a Halloween party, several boxes can become a surprisingly convincing haunted carnival booth.
Use large boxes or joined panels to create the counter and side sections. Add striped cardboard panels across the top and create oversized carnival lettering.
Red, cream and black can establish the basic palette, while aged brown and grey help keep it from looking too bright.
Turn one section into a fictional fortune-teller booth, spooky ticket stand or trick-or-treat kiosk.
Internal braces matter here because large flat cardboard walls flex easily. Fold triangular supports behind panels and double the areas where different pieces connect.
This is an advanced temporary party prop rather than a long-term structure, but it demonstrates how cardboard boxes can become architecture rather than merely craft material.
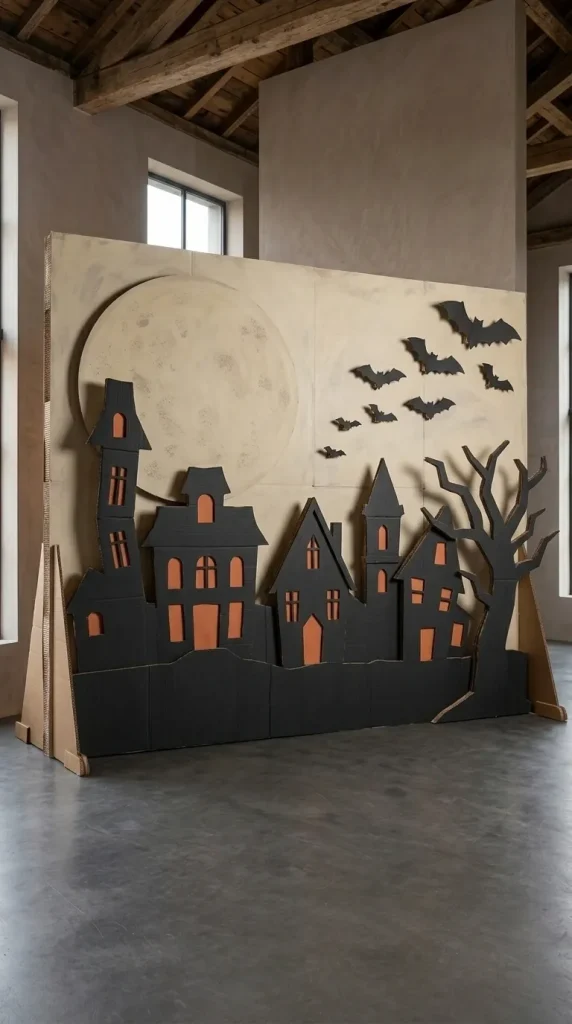
21. Make a Cardboard Photo Booth Backdrop
A Halloween party backdrop should focus on large shapes that remain visible in photographs.
Create a layered haunted skyline, giant moon, bats, tombstones or crooked tree silhouettes from cardboard and mount them against a plain wall or freestanding supported panel.
Choose two or three large design elements rather than filling the backdrop with tiny details that disappear in photographs.
Depth helps. Place the moon at the rear, haunted buildings in front and a few bats on raised cardboard spacers so the backdrop is not completely flat.
Black, cream and muted orange photograph well for classic Halloween, while black and burgundy create a darker look.
Make the structure wide enough for the expected group size before spending time on the decorative details.

22. Build a Cardboard Office Haunted-House Facade
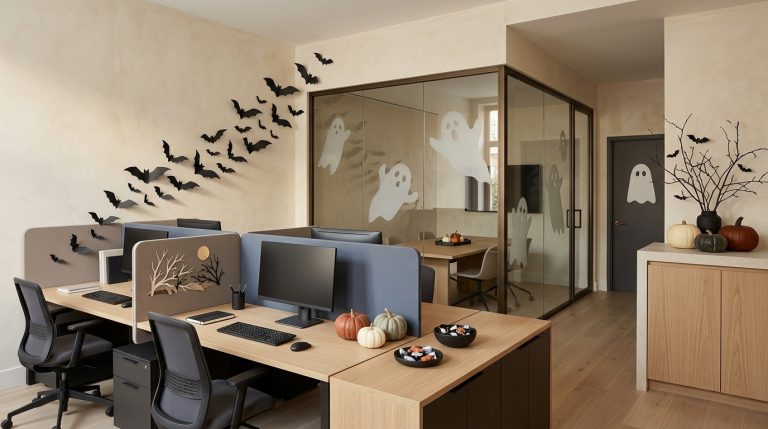
Cardboard is particularly useful for temporary office decor because it can transform vertical cubicle panels without adding much weight.
Create haunted-house windows, faux boarded sections and crooked signs from flat cardboard, then attach them to a cubicle or office divider with removable methods suitable for the surface.
Keep the desktop mostly free. One small pumpkin or miniature coffin can connect the workstation to the larger wall treatment.
Use lightweight pieces near computer equipment and avoid loose cardboard dust around electronics by finishing cut edges before installation.
A black, grey and muted orange palette keeps the theme recognisable without covering the workspace in unrelated props.
This provides strong visual impact while keeping cardboard at the centre of the design.
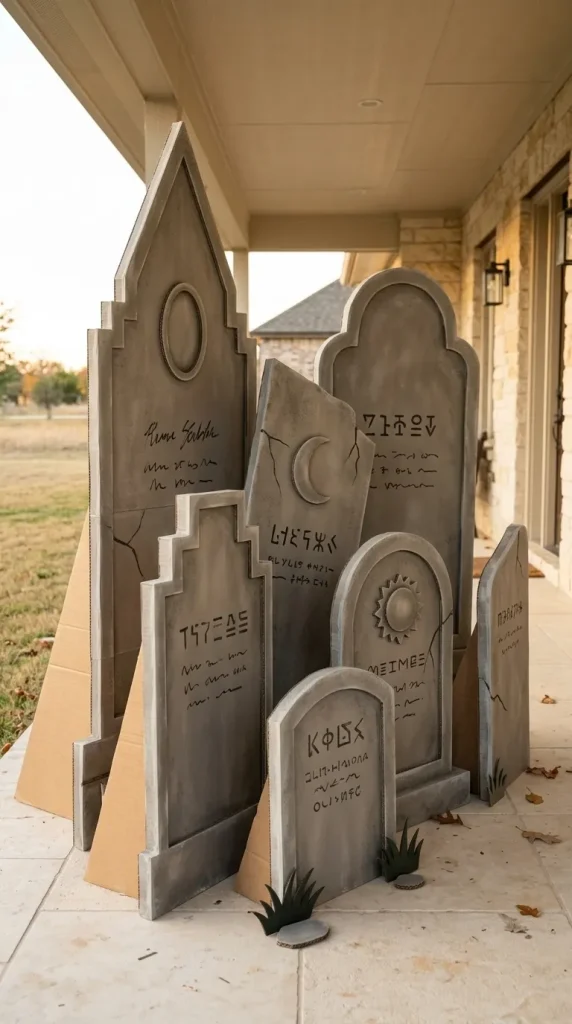
23. Create a Giant Cardboard Yard Tombstone Display
For a temporary exterior display, scale up the tombstone idea but strengthen the construction.
Use double-wall cardboard where possible and laminate two or more layers together for each large tombstone.
Add wide rear supports or triangular braces rather than expecting a tall flat panel to stand by itself.
Create different tombstone shapes and heights so the display feels like a cemetery rather than repeated signs.
Paint and finish all visible edges before installation.
Cardboard yard decor is best for dry conditions, a covered area or a short-term Halloween-night display. If the forecast is wet, bring the pieces inside rather than assuming paint alone has made standard cardboard weatherproof.
For stronger visual impact, group several tombstones together instead of spacing them thinly across an enormous lawn.
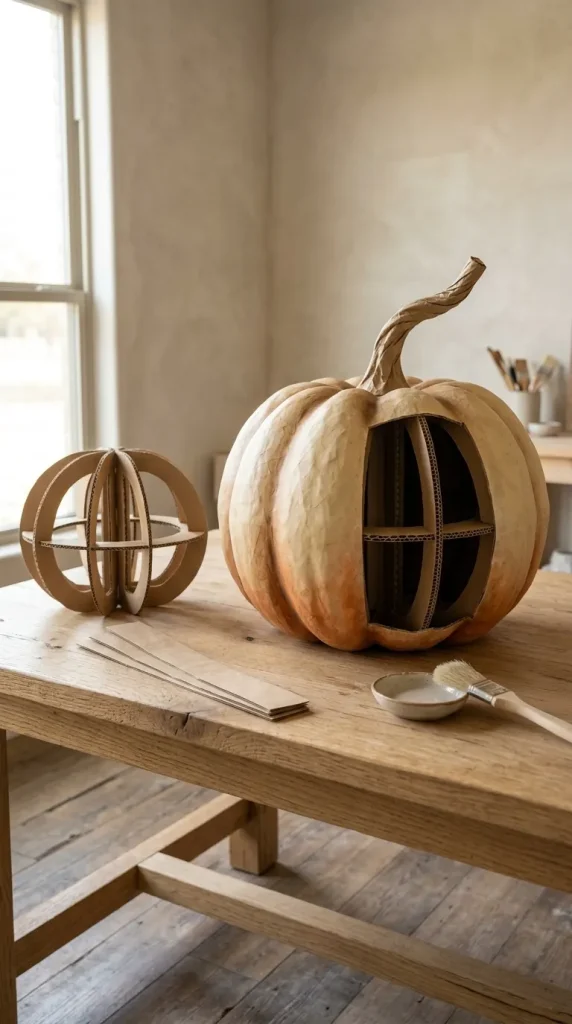
24. Build a Sculptural Cardboard Pumpkin With Paper-Mâché Finish
Paper mâché can help when you want cardboard to lose its boxy appearance.
Start with a ribbed cardboard pumpkin framework rather than trying to shape wet paper from nothing. The cardboard provides structure while the paper layer connects the ribs and softens the transitions.
Once dry, paint the pumpkin according to the intended style. Dark orange and brown shading creates a traditional pumpkin, while faded cream and muted orange suit vintage Halloween.
Do not apply an unnecessarily heavy coating. The goal is to smooth and unify the structure, not bury it under a thick shell.
This technique is most useful for organic forms such as pumpkins, monster heads and sculptural props where exposed straight cardboard edges would be distracting.
It is a more advanced project, but it demonstrates how cardboard can function as an armature rather than only a visible finished surface.
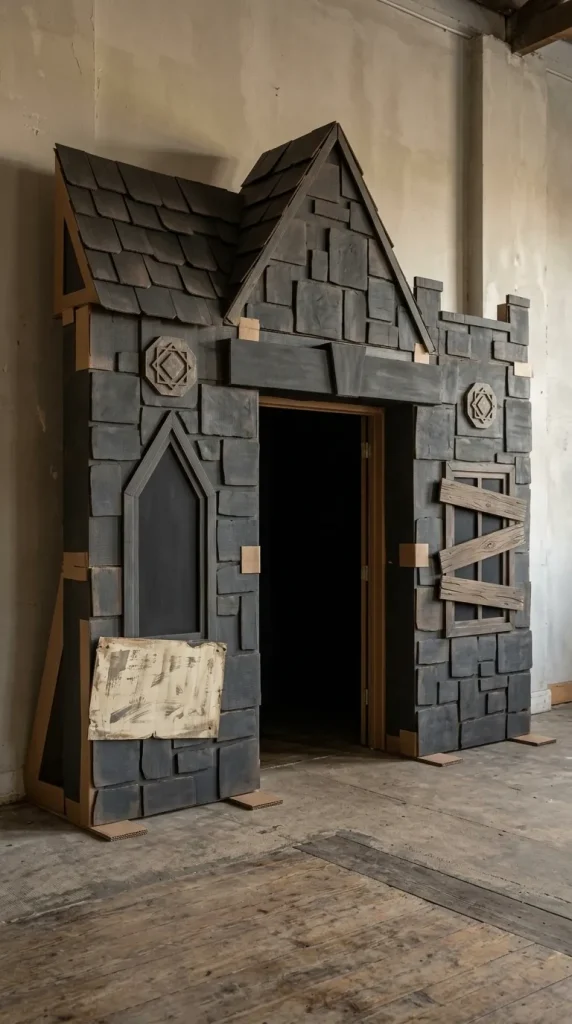
25. Build a Large Cardboard Haunted-House Entrance
For the most ambitious project, use large cardboard panels and boxes to create a temporary haunted-house entrance around an indoor doorway, party entrance or sheltered porch.
Start by measuring the usable area before cutting anything. Build the facade in separate modules—side walls, top section, windows and decorative trim—so you do not have to move one enormous fragile piece.
Use doubled cardboard along the vertical supports and internal braces behind wide panels.
Layer crooked windows, faux boards, roof trim and signs onto the main structure. Paint the large background surfaces first, then add lighter dry brushing and detail after assembly.
Keep the doorway itself completely clear and avoid narrowing the usable passage with projecting props.
A weathered timber finish gives the entrance a haunted cabin look, while charcoal faux stone can make it resemble an abandoned mansion or crypt.
This is the kind of project where cardboard’s low cost becomes especially useful: you can create a large visual transformation without using expensive construction materials, provided you reinforce the structure intelligently.
How to Choose the Right Cardboard for Halloween Decorations
Not every box is equally useful.
Thin paperboard from cereal, snack or product boxes is best for small overlays, curved details, fine cutouts and lightweight hanging pieces.
Standard corrugated shipping cardboard is the most versatile option. It works for signs, tombstones, pumpkins, houses and many medium-size props.
Double-wall corrugated cardboard is much better for large freestanding pieces because it resists bending more effectively.
Use cleaner, flatter cardboard for highly visible exterior surfaces. Save heavily creased or printed pieces for internal braces, hidden structural layers and smaller components.
If a large panel is bowed before you begin, paint will not magically straighten it.
Flat Cardboard vs Cardboard Boxes
Flat cardboard is ideal when the finished decoration is primarily graphic.
Use it for bats, ghosts, window silhouettes, signs, pumpkin faces, tombstones, wreaths and wall decor.
Boxes already contain corners and volume, so they are better for dimensional projects.
Use boxes for haunted houses, coffin forms, booths, display risers and larger props where the existing shape saves construction time.
Before flattening a box automatically, ask whether its corners or depth could become part of the design.
How to Make Cardboard Halloween Decorations Look Better
Add Layers
Layering is one of the easiest ways to make cardboard look less basic.
A tombstone can have a raised border. A haunted house can have separate window frames and shutters. A sign can have dimensional letters. A pumpkin can have layered ribs.
Even one additional layer creates shadows and makes the piece feel constructed rather than simply cut out.
Score Instead of Cutting Every Fold
For boxes, houses and coffins, do not separate every surface into individual panels if one piece can be folded.
Lightly cut or compress only the outer face of the cardboard along the intended fold line without slicing completely through it.
This allows the board to bend much more cleanly.
Reinforce Large Pieces
Tall props need more than thick paint.
Add doubled panels, folded cardboard channels, triangular rear braces and internal cross supports.
Reinforcement should be planned before decorative finishing. It is much easier to strengthen the structure while the reverse side is still accessible.
Hide Corrugated Edges
Exposed corrugation can suit deliberately rustic projects, but it often makes polished decor look unfinished.
Cover visible edges with paper strips, thin cardstock, tape suitable for painting or additional trim pieces.
Then paint the edge together with the main surface.
Cover Packaging Print
Shipping labels and branded printing should not remain visible unless they deliberately support the design.
Opaque paint may require more than one coat. Alternatively, cover the surface with kraft paper, tissue, decorative paper or another thin layer before painting.
Best Finishes for Cardboard Halloween Decor
| Effect | Useful approach | Works well for |
|---|---|---|
| Faux stone | Layered grey paint, stippling, light dry brushing | Tombstones, crypts, haunted walls |
| Aged wood | Scored grain lines, brown/grey layers, dry brushing | Coffins, signs, boarded windows |
| Modern matte | Smooth black or cream paint, simple edges | Bats, pumpkins, monochrome decor |
| Vintage Halloween | Faded orange, cream, black, distressed paper | Signs, houses, pumpkin faces |
| Gothic | Deep black, charcoal, burgundy accents | Coffins, haunted houses, wall decor |
| Cute Halloween | Pastel paint, rounded shapes, simple faces | Pumpkins, spiders, ghosts |
| Sculptural | Cardboard armature plus light paper-mâché | Large pumpkins, monster props |
The finishing method should support the project. A weathered tombstone benefits from texture, while a cute pastel pumpkin usually looks better with a cleaner painted surface.
How to Use Cardboard Halloween Decorations Outdoors
Cardboard performs best indoors, so use realistic expectations outside.
Covered porches and sheltered entrances are the safest places for cardboard decor.
A dry-weather party or Halloween-night display can also work if the props are stored indoors before and after use.
Large outdoor pieces should have stronger bases and braces because even dry cardboard can move in wind.
A protective coating may improve resistance to occasional moisture, but standard cardboard should still not be treated as equivalent to plastic, foam board or plywood.
If rain is likely, move the decor inside.
That may sound less exciting than promising a completely weatherproof cardboard cemetery, but it prevents hours of work from becoming soggy after one wet evening.
Indoor Cardboard Halloween Decoration Ideas
Indoors, cardboard becomes much more versatile because moisture is less of a concern.
Bedroom walls can hold bat swarms, ghost silhouettes or small haunted skylines.
Shelves and consoles can display miniature haunted houses, Halloween villages and cardboard pumpkins.
Doors can support monster faces, coffins or haunted-house facades.
Party rooms can handle larger booths, signs and backdrops.
Offices can use lightweight cubicle decorations.
Because indoor pieces do not need substantial weather protection, more time can be spent on decorative finishing and details.
Cardboard Halloween Decorations for Bedrooms
Bedrooms usually benefit from smaller, vertical pieces rather than enormous floor props.
Black bats climbing behind a bed or desk can create impact without clutter.
A miniature Halloween village can sit on a shelf.
Window silhouettes can create a stronger effect at night without changing the furniture arrangement.
One small coffin, vintage pumpkin sign or hanging cardboard decoration can provide a focal point.
Choose decorations according to how the room is actually used. Halloween decor should not make drawers, closets or work areas difficult to access.
Cardboard Halloween Party Decorations
Party decor can prioritise temporary visual impact.
A cardboard photo backdrop, haunted stall, giant pumpkin or collection of signs can transform a room for an evening without needing to survive several seasons outdoors.
Use large graphic pieces around photo areas, buffet tables and entrances.
Boxes can also become risers under covered party tables, provided the load is light and the cardboard remains dry.
For larger temporary installations, build in sections so the pieces can be transported and assembled more easily.
What Should You Avoid With Cardboard Halloween DIY?
Using Weak Cardboard for Large Props
Thin board may be perfect for bats but unsuitable for a tall tombstone or freestanding haunted house.
Match the material strength to the size and load of the project.
Leaving Box Printing Visible
Random shipping logos and labels instantly reveal the material unless they are part of an intentional recycled aesthetic.
Cover or paint them before finishing.
Cutting Intricate Details From Thick Corrugated Board
Small curves and narrow points often tear.
Use stronger, simpler silhouettes and add fine details later with thin paperboard, cardstock or paint.
Making Everything One Flat Layer
Cardboard’s greatest advantage is that it can be layered cheaply.
Raised borders, framing, trim and dimensional lettering can dramatically improve even simple designs.
Forgetting About Stability
A freestanding piece should be tested before decorative painting is complete.
If it leans while bare, another coat of paint will not solve the structural problem.
Add a wider base or rear braces.
Assuming Paint Makes Cardboard Weatherproof
Paint can improve the surface finish, but ordinary cardboard remains vulnerable to prolonged moisture.
Use sheltered locations and temporary outdoor setups.
Ignoring the Edges
A carefully painted front surface with exposed, ragged corrugated edges can still look unfinished.
Finish the edges that will be visible.
Using the Wrong Finish for the Style
A glossy perfect surface may work for a modern pumpkin but look strange on a decayed tombstone.
A heavily distressed finish may suit haunted wood but undermine a clean pastel decoration.
Match the treatment to the concept.
Overloading One Project With Every Halloween Motif
A haunted house does not necessarily need pumpkins, bats, ghosts, spiders, skeletons, witches and five signs.
Choose one dominant concept and one or two supporting motifs.
How to Plan a Cardboard Halloween Project
Before cutting, answer five questions.
Where will it be used? Indoor decor can be more delicate. Sheltered outdoor decor needs more reinforcement and moisture awareness.
How large does it need to be? Small objects can use lightweight board. Large props need thicker panels and internal structure.
Does it need to stand by itself? Wall-mounted decorations are much easier structurally than freestanding ones.
How much time do you have? Simple silhouettes and signs can be completed quickly. Haunted houses and giant props require more measuring, reinforcing and finishing.
What should the finished surface look like? A vintage pumpkin, faux-stone tombstone and modern black bat require very different finishing methods.
Planning those decisions first prevents you from choosing a project that is too fragile, too complicated or poorly suited to the location.
Frequently Asked Questions
What can I make out of cardboard for Halloween?
Cardboard can be used for bats, pumpkins, jack-o’-lanterns, ghosts, tombstones, spiders, coffins, signs, haunted houses, Halloween villages, window silhouettes, door facades, party backdrops and large temporary props.
What are the easiest cardboard Halloween decorations?
Flat bats, ghost silhouettes, pumpkin faces, signs and basic tombstones are good beginner projects because they require mostly cutting, painting and simple layering.
Can I make Halloween decorations from cardboard boxes?
Yes. Boxes are particularly useful because they already provide volume and corners. They work well for haunted houses, coffins, booths, display stands and dimensional props.
Can cardboard Halloween decorations go outside?
They can be used in sheltered exterior areas or for temporary dry-weather displays, but untreated standard cardboard is not genuinely weatherproof and can deteriorate with prolonged moisture.
How do I make cardboard look like stone?
Use several grey paint values rather than one flat colour. Stipple darker shades into recesses and lightly dry-brush raised areas with paler grey. Layered cardboard borders can add physical depth.
How do I make cardboard look like old wood?
Score plank and grain lines into the surface, then layer brown, charcoal and grey paint. Uneven dry brushing can suggest age and worn texture.
How do I make cardboard props stand up?
Use a wide base, triangular rear supports, doubled cardboard panels or internal cross braces. Larger props often need several reinforcement methods working together.
What cardboard is best for large Halloween props?
Thicker corrugated or double-wall cardboard is generally better for large structures than thin packaging board. Thin board is better reserved for decorative overlays and detailed elements.
Can I use paper mâché over cardboard?
Yes. Cardboard can provide the structural armature while a light paper-mâché layer softens angular surfaces. This is particularly useful for pumpkins and other sculptural props.
Final Thoughts
The biggest advantage of cardboard Halloween decorations is not simply that cardboard is cheap.
It is that the material can perform several jobs.
A flat sheet can become a silhouette. A box can become a building. A scored panel can fold into a coffin. Layers can imitate carved stone. Folded braces can support a large prop. Paper and paint can disguise shipping-box surfaces completely.
The question to ask is therefore not, “How do I make Halloween decor from a cardboard box?”
Ask instead, “What does this cardboard need to become structurally, and what finish will make that transformation convincing?”
That change in approach is what separates a shipping box painted black from a Halloween decoration that feels deliberately designed.
Start with a project suited to your material and skill level, reinforce it before decorating, layer where depth matters, finish the visible edges and use outdoor cardboard only where its limitations make sense.
Once those basics are handled, ordinary packaging can become everything from a five-minute bat decoration to an entire illuminated Halloween village.