35 Halloween Window Art Ideas for Spooky, Cute and Easy Displays
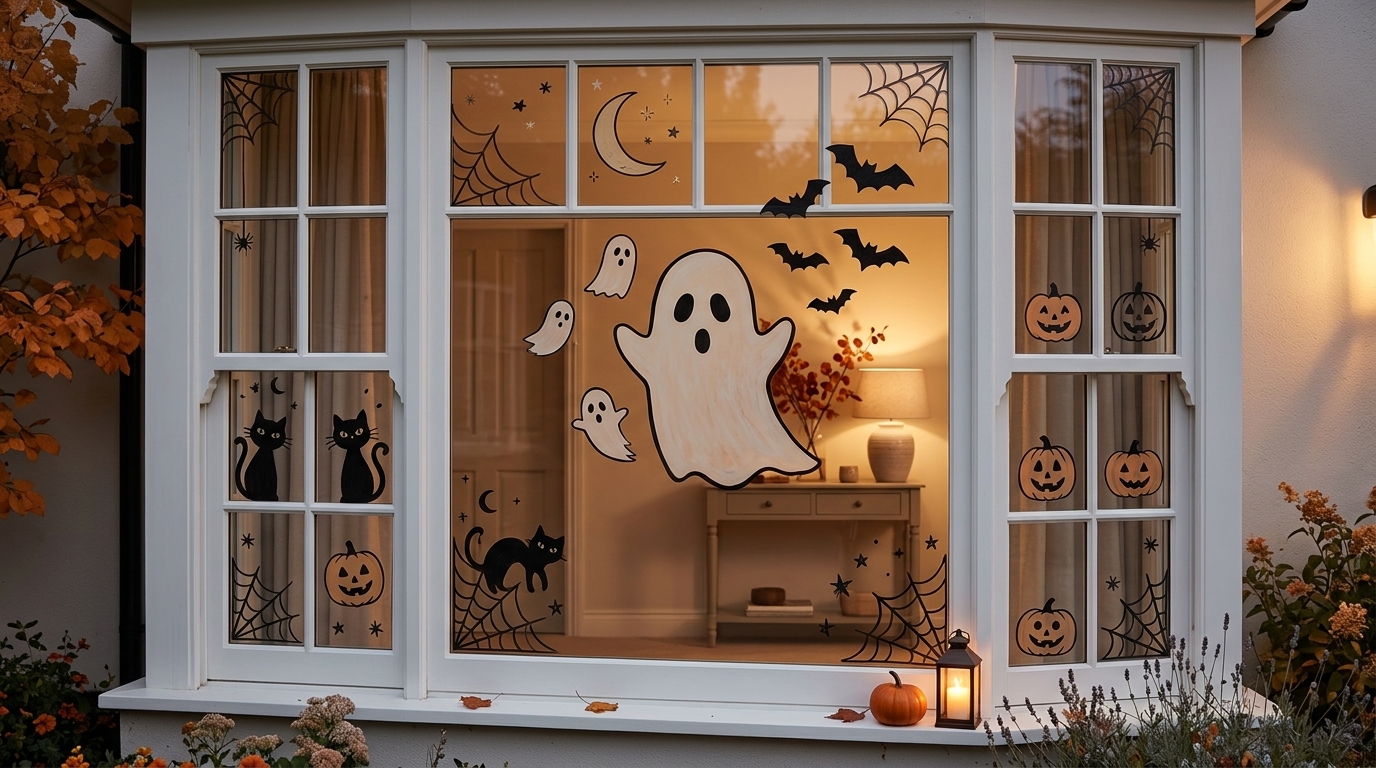
Halloween window art can completely transform a room, storefront, classroom or front window without requiring elaborate decorations. A few white ghost drawings can make ordinary glass feel playful, a swarm of black bats can create instant drama, and a full painted haunted-house scene can turn a large window into one of the most eye-catching parts of a Halloween display.
The best Halloween window art ideas are not all complicated. In fact, some of the strongest designs rely on simple silhouettes, repeated motifs and bold shapes that are easy to recognise from a distance. Ghosts, pumpkins, spider webs, cats, moons and bats can all look effective even when drawn with basic lines.
The technique matters just as much as the subject. Chalk markers are useful for crisp temporary outlines. Window-safe paints can create more substantial scenes. Black paper silhouettes offer a no-paint alternative, while tissue paper and translucent materials can imitate stained glass. The right method depends on the window, your skill level and whether the design needs to be visible mainly from indoors or from the street.
These 35 ideas range from five-minute beginner projects to larger artistic displays for businesses and front windows. Before applying paint or markers directly to glass, always check that the specific product is intended for the surface, review the manufacturer’s removal instructions and test a small inconspicuous area if necessary.
Start With Easy Halloween Window Art
1. Draw a Border of Simple White Ghosts
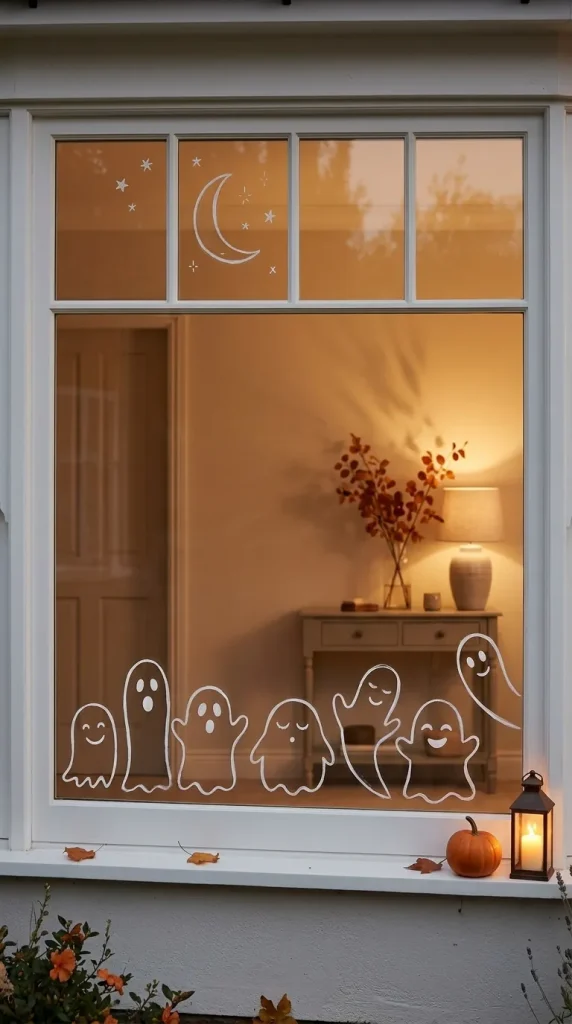
White ghost outlines are one of the easiest Halloween window art ideas because the shapes do not need to be precise.
Use a suitable white chalk marker to draw small rounded ghosts along the lower edge or sides of the window. Give each ghost a slightly different shape and facial expression so the border feels playful rather than repetitive.
Leave plenty of clear glass between the figures. The white lines stand out especially well after dark when the room behind the window is less bright.
2. Create One Oversized Peekaboo Ghost
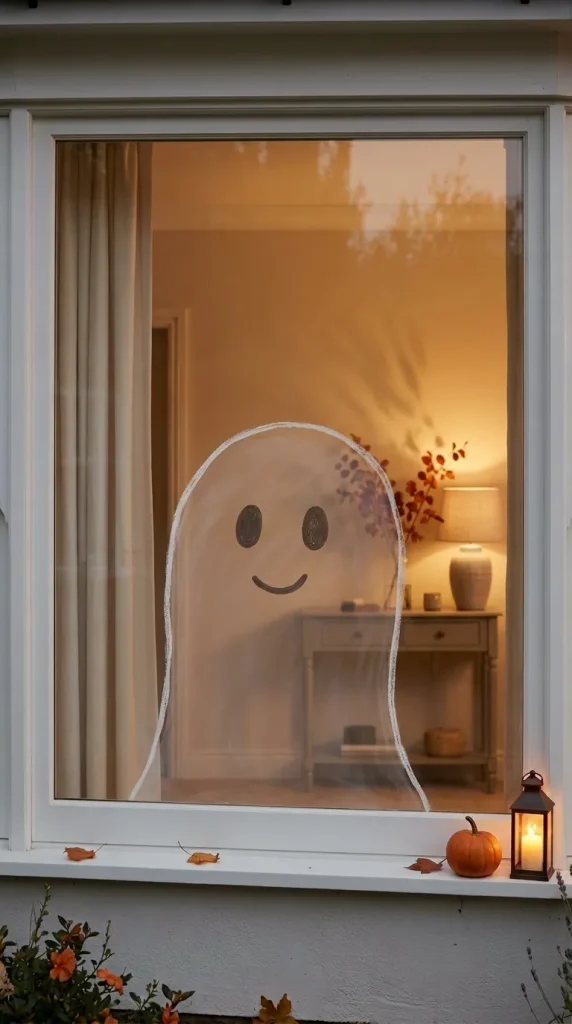
Instead of filling the glass with several small motifs, let one giant ghost become the entire composition.
Draw or paint the ghost so it appears to rise from the bottom edge of the window, with only part of its body visible. Two simple dark eyes and a curved mouth are enough to make the design recognisable.
This works particularly well on a narrow front window or one large pane because the oversized scale creates more impact than several tiny decorations.
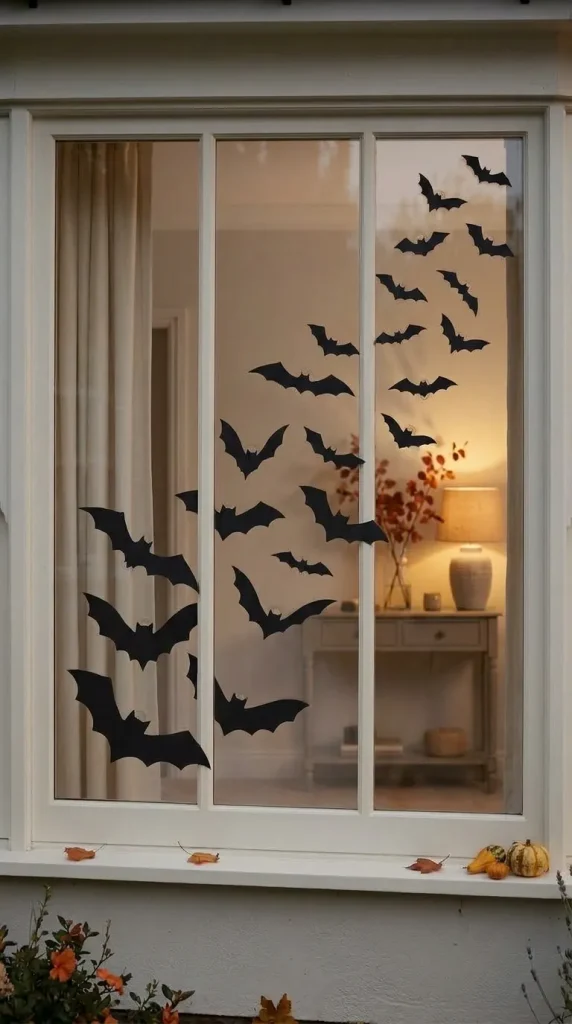
3. Make a Swarm of Black Bats
Bats are ideal for beginners because a recognisable silhouette can be created with only a few simple angles.
Cut bats from black cardstock or use a reusable stencil to repeat them across the glass. Begin with larger bats near one corner and gradually make them smaller as they move upward or across the window.
Changing the angle of each bat creates movement and makes the display feel more natural.
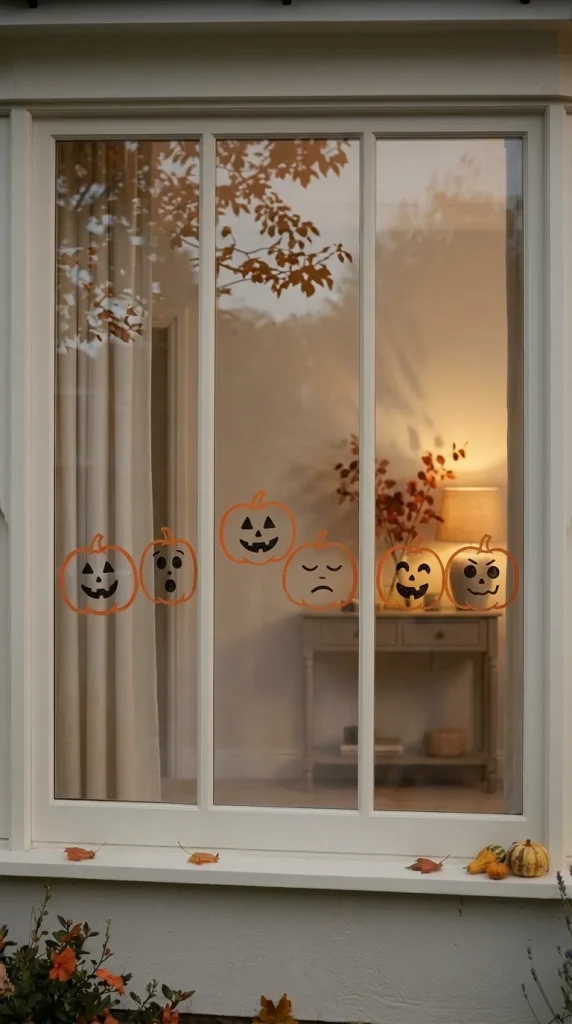
4. Draw Easy Jack-o’-Lantern Faces
You do not need to draw detailed pumpkins to create recognisable Halloween art.
Use orange window-safe paint or marker to make a row of simple rounded pumpkin shapes, then add different black faces. One can look cheerful, another surprised and another slightly spooky.
The changing expressions give a simple beginner project much more personality.
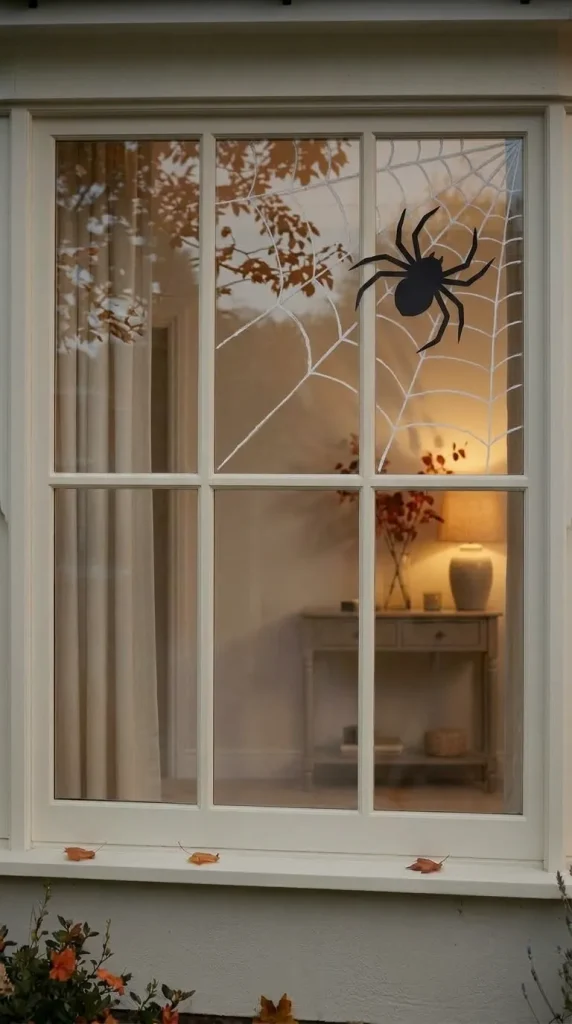
5. Fill One Corner With a Giant Spider Web
Spider webs work naturally with window architecture because their radiating lines can begin in a corner.
Use white chalk marker for a crisp graphic effect or black for a stronger daytime silhouette. Start with several long lines extending from the corner, then connect them with curved sections.
Add one large paper or painted spider near the centre instead of covering the window with several smaller motifs.
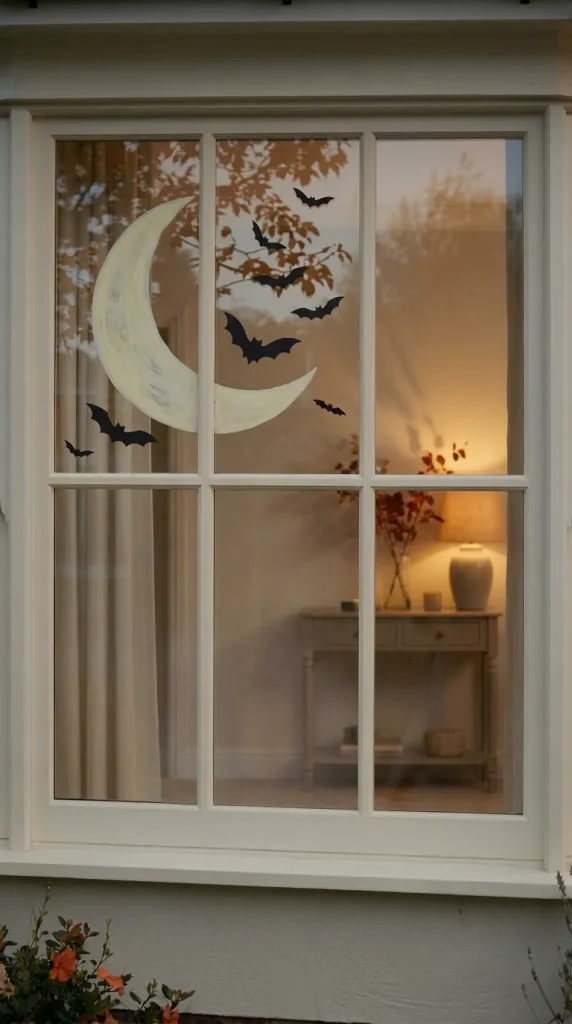
6. Draw a Minimal Crescent Moon and Flying Bats
A crescent moon and a few bats can create a surprisingly elegant Halloween window without looking busy.
Draw a large moon in white or pale yellow, then add several small black bats around it. Place the design toward one side rather than centring every element.
The negative space makes this especially suitable for modern homes and people who prefer subtle Halloween decoration.
Use Chalk Markers for Temporary Window Art
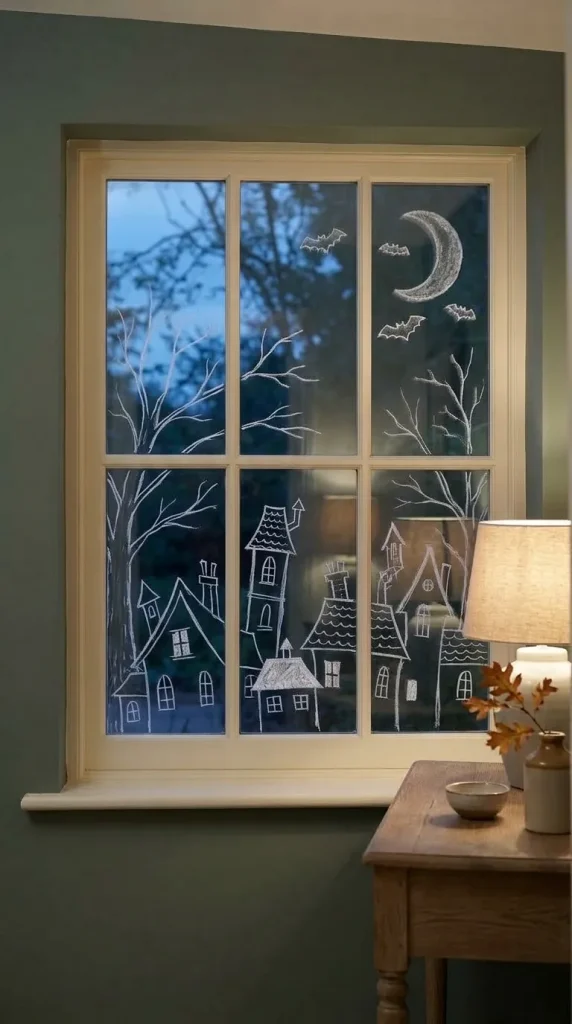
7. Create a White Chalk Haunted-House Skyline
A haunted-house skyline looks detailed from a distance even when the drawing itself is simple.
Draw crooked rooftops, narrow towers and uneven windows along the lower portion of the glass. Add a moon, a few bats and several bare trees behind the buildings.
Keep the shapes primarily in outline form if you want an easy project, or fill selected sections for a bolder graphic effect.
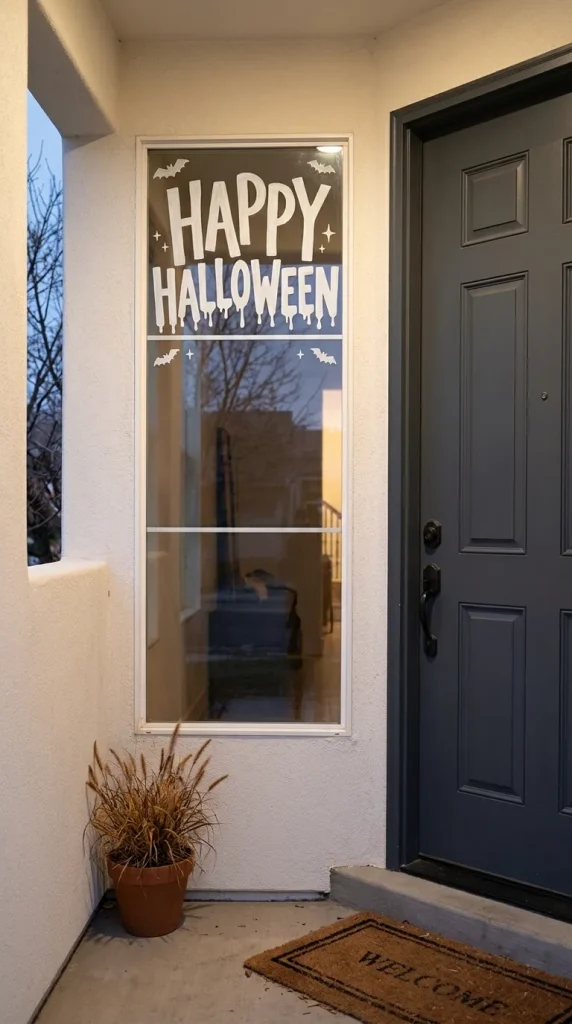
8. Draw Dripping Halloween Lettering
Lettering can become the main feature when the window is too small for a full scene.
Write a simple Halloween greeting or spooky phrase using a broad chalk marker, then extend small drips from the bottom of selected letters.
Keep the wording large and readable from several metres away. A few small bats or stars can frame the message without competing with it.
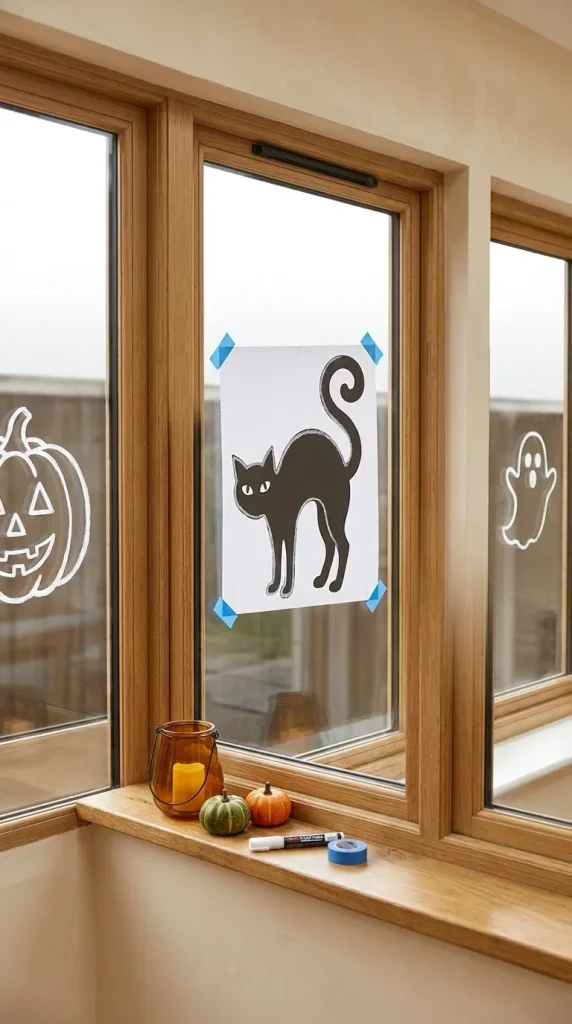
9. Trace Halloween Templates Behind the Glass
If you do not feel comfortable drawing freehand, tracing can produce much cleaner results.
Print a ghost, pumpkin, skull, cat or bat outline and temporarily position the template on the opposite side of the window. Trace the design with a suitable glass marker, then remove the paper.
This technique is especially useful when several windows need matching artwork.
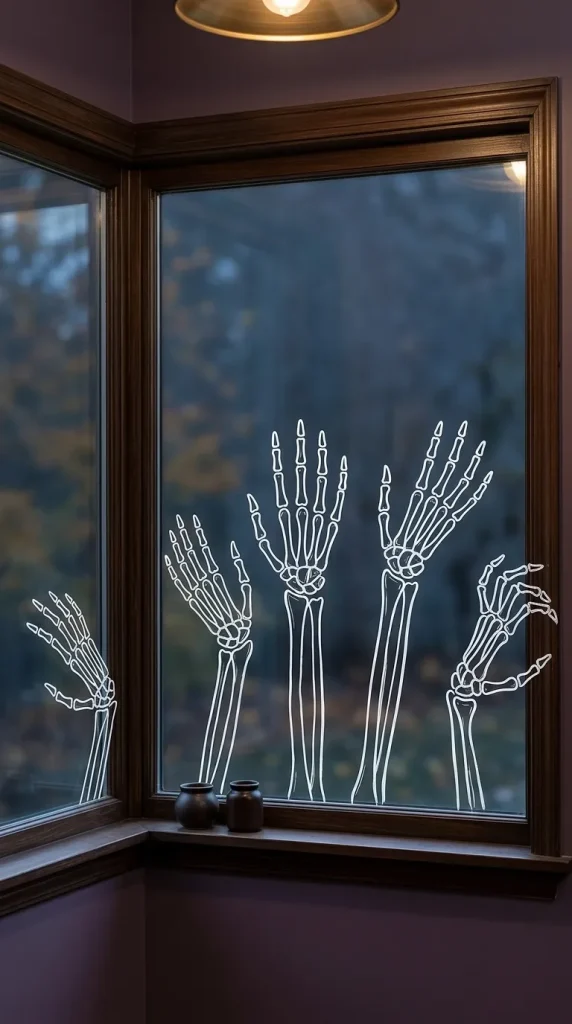
10. Draw a White Skeleton-Hand Border
A complete skeleton is difficult for many beginners, but skeletal hands are much easier to simplify.
Draw several hands reaching upward from the bottom of the window. Use long finger bones and simple joints rather than trying to make the anatomy realistic.
A row of hands can create a creepy effect while still relying on repeatable line art.
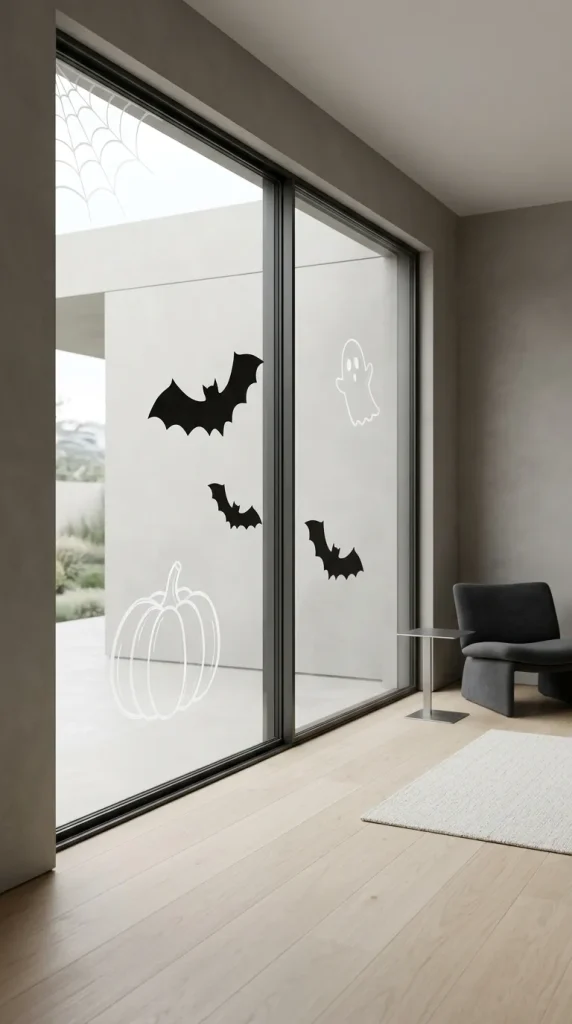
11. Create Minimal Black-and-White Halloween Line Art
A monochrome window can feel much more sophisticated than a multicoloured display.
Use white outlines for pumpkins, ghosts and spider webs, then introduce black through a few silhouettes or paper shapes. Keep each motif spaced apart.
This is particularly effective on contemporary windows where a heavily decorated Halloween scene would feel out of place.
Create Halloween Window Art With Paper
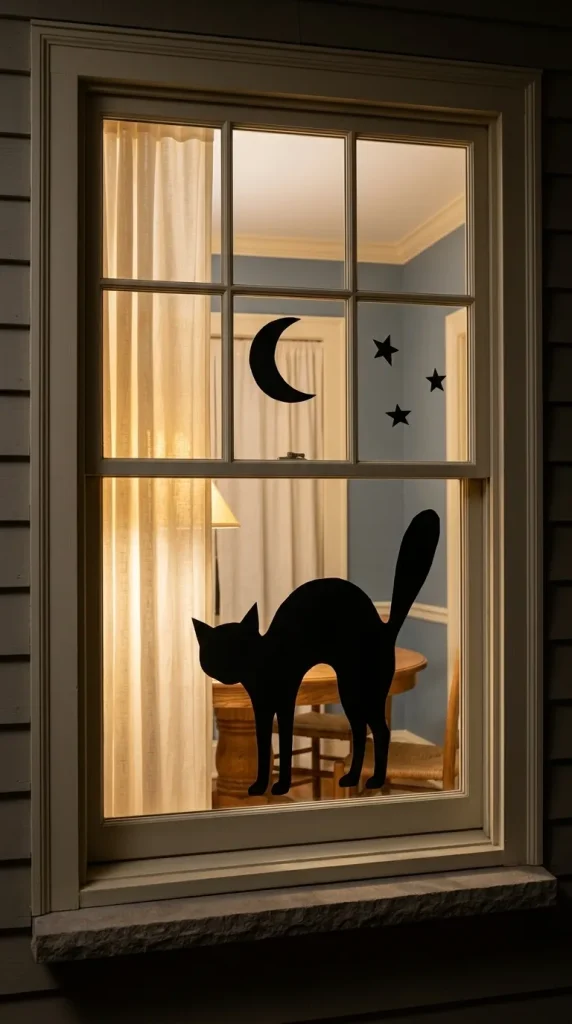
12. Make Black Paper Cat Silhouettes
A black cat silhouette is instantly recognisable and extremely easy to create with paper.
Cut a cat with an arched back and curved tail from black cardstock, then place it along the lower edge of the window. Add a crescent moon or several small stars above it.
For stronger nighttime visibility, position a pale curtain or interior light behind the silhouette.
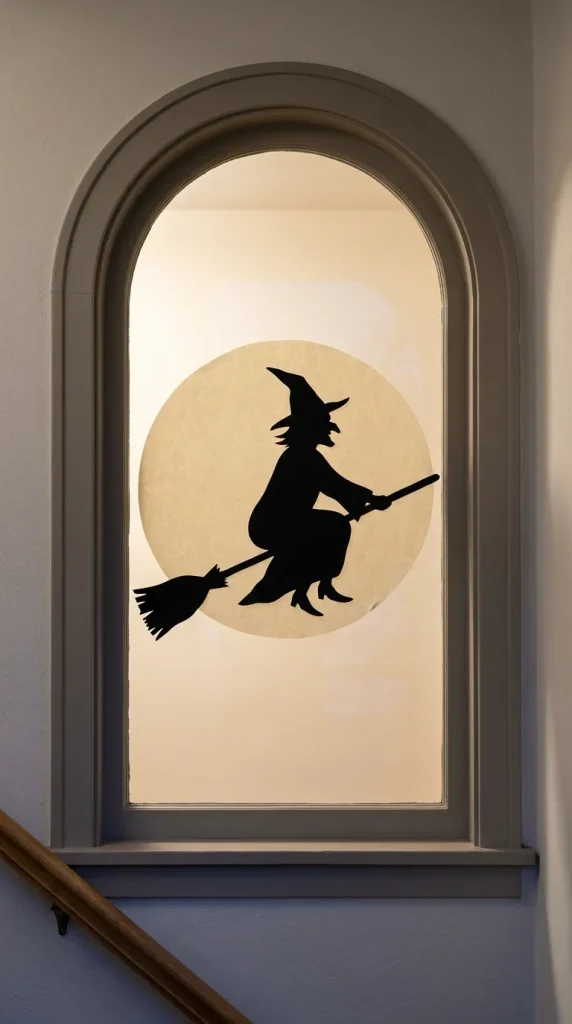
13. Create a Paper Witch Flying Across the Moon
This classic Halloween composition can be created without painting directly onto the glass.
Cut a witch and broomstick from black paper, then place the silhouette over a large pale paper or painted moon.
Keep the witch shape simple. The pointed hat, broom and profile create enough visual information for the figure to be understood from outside.
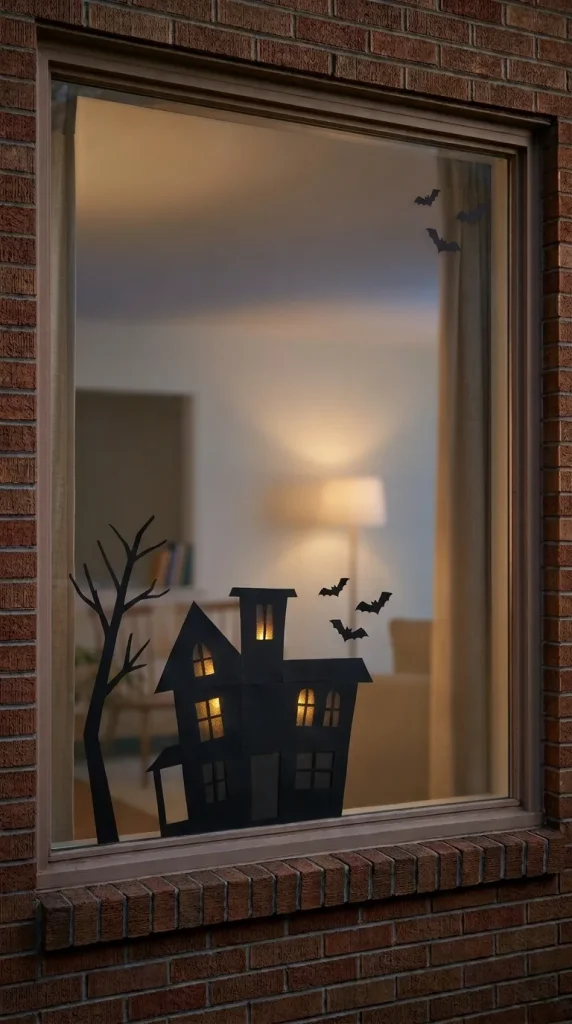
14. Build a Paper Haunted-House Silhouette
A haunted house is ideal for a large front window because it creates a complete scene from only a few shapes.
Cut a crooked house, bare trees and bats from black paper. Use yellow translucent paper behind selected windows to suggest glowing interior lights.
Place the house along the bottom of the window and leave the upper section mostly clear so the silhouette remains easy to read.
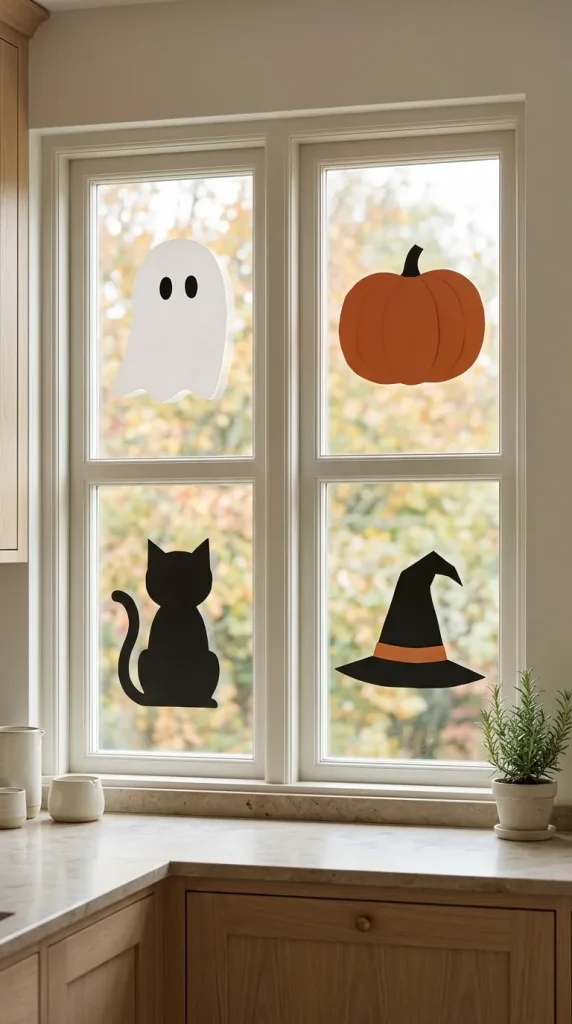
15. Make a Multi-Pane Halloween Character Window
If your window has several panes, use the architecture to organise the artwork.
Place one simple character in each section: a ghost in one pane, a pumpkin in another, a cat in a third and a witch hat in the fourth.
Using a consistent palette—such as black, white and orange—keeps the separate designs connected.
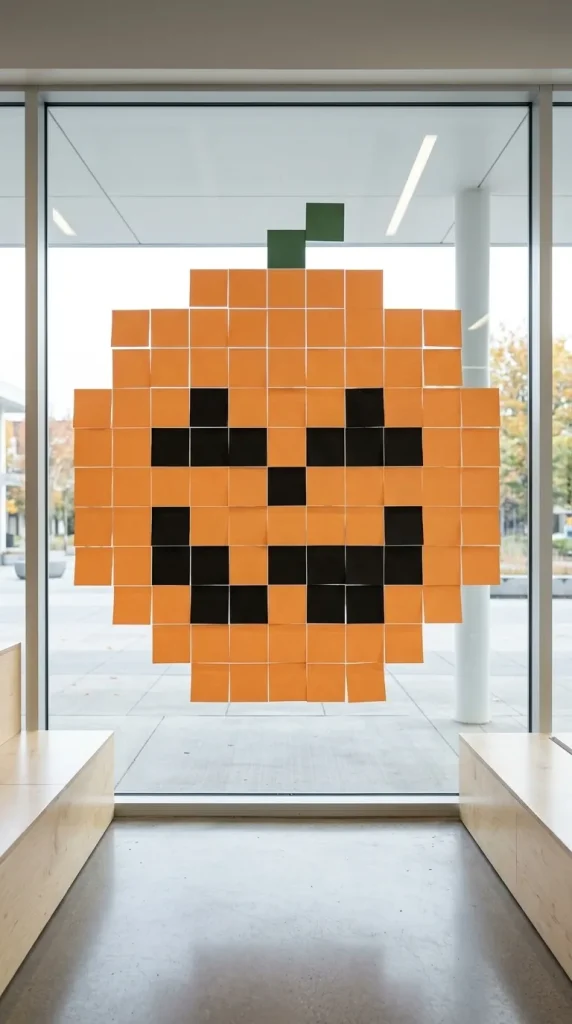
16. Create a Pixel-Style Pumpkin With Sticky Notes
Large office, school or store windows can be transformed using coloured sticky notes.
Arrange orange notes into a blocky pumpkin shape and use black notes for the eyes and mouth. Because the design is built on a grid, no drawing skill is needed.
This technique works best on large glass areas where the image can be viewed from a reasonable distance.
Make Cute Halloween Window Art for Kids
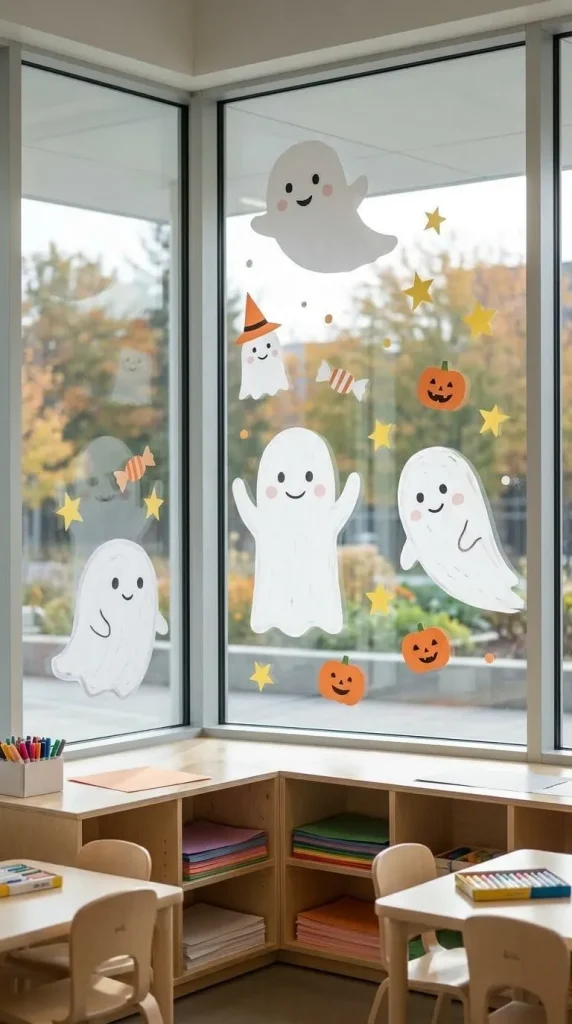
17. Create Smiling Ghosts for a Classroom Window
Classroom and daycare windows usually benefit from cheerful rather than frightening designs.
Draw rounded white ghosts with smiling faces, rosy cheeks or tiny hats. Space them between stars, candy shapes and small pumpkins.
Children can contribute simple drawings or paper shapes so the finished display feels collaborative rather than professionally perfect.
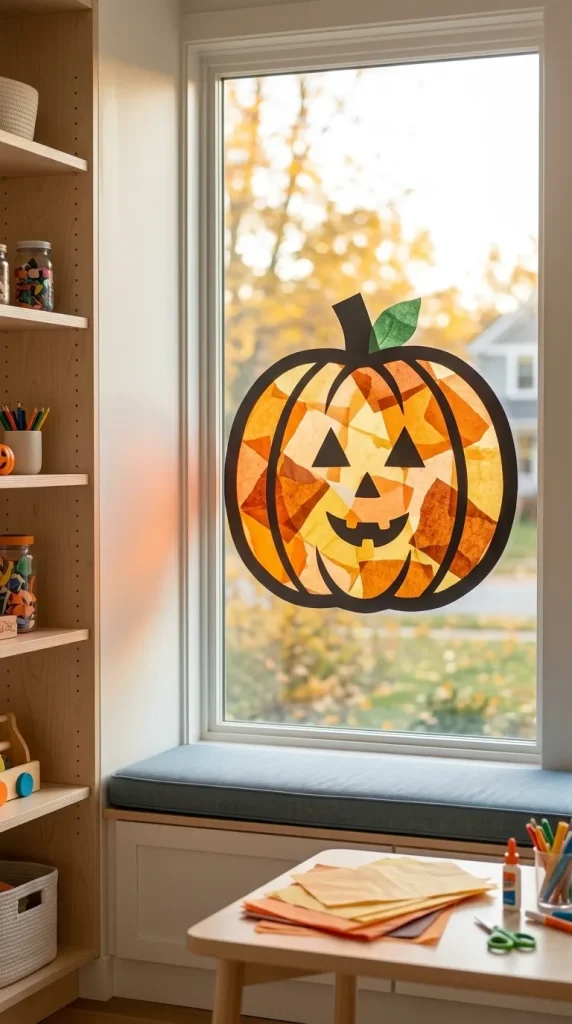
18. Make Tissue-Paper Pumpkin Windows
Tissue paper can create a colourful translucent effect that looks especially attractive in daylight.
Cut an outline for a pumpkin from dark paper, then fill the interior with overlapping pieces of orange and yellow tissue paper attached to a suitable transparent backing.
Add a black face if desired. When light passes through the window, the overlapping colours create a simple stained-glass effect.
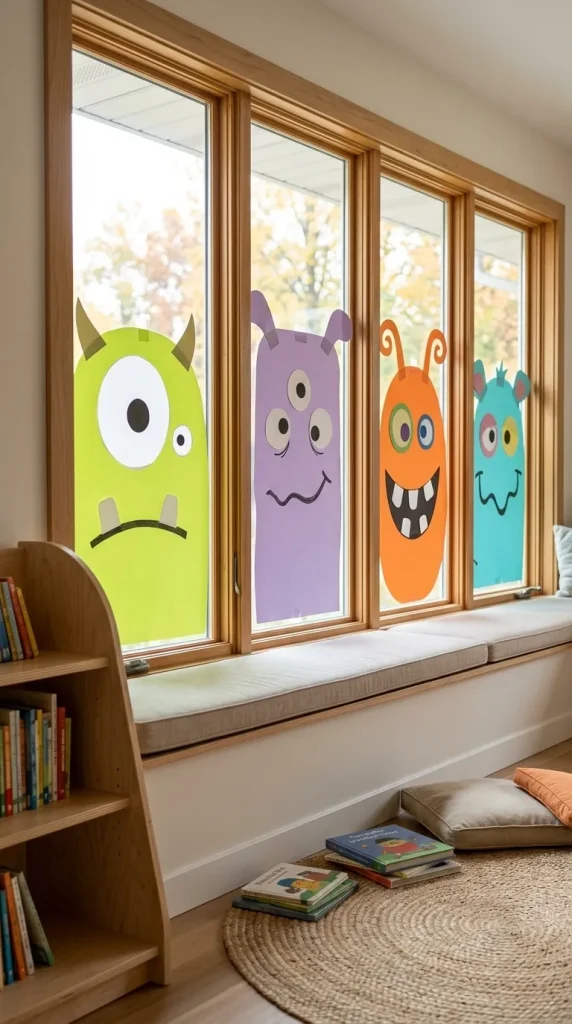
19. Create Friendly Monster Faces
Monster faces allow children to invent rather than copy a specific Halloween character.
Use large coloured paper shapes or washable window materials suitable for the glass. Add mismatched eyes, funny teeth, horns and exaggerated expressions.
Each pane can contain a different monster, making this especially effective for school and preschool windows.
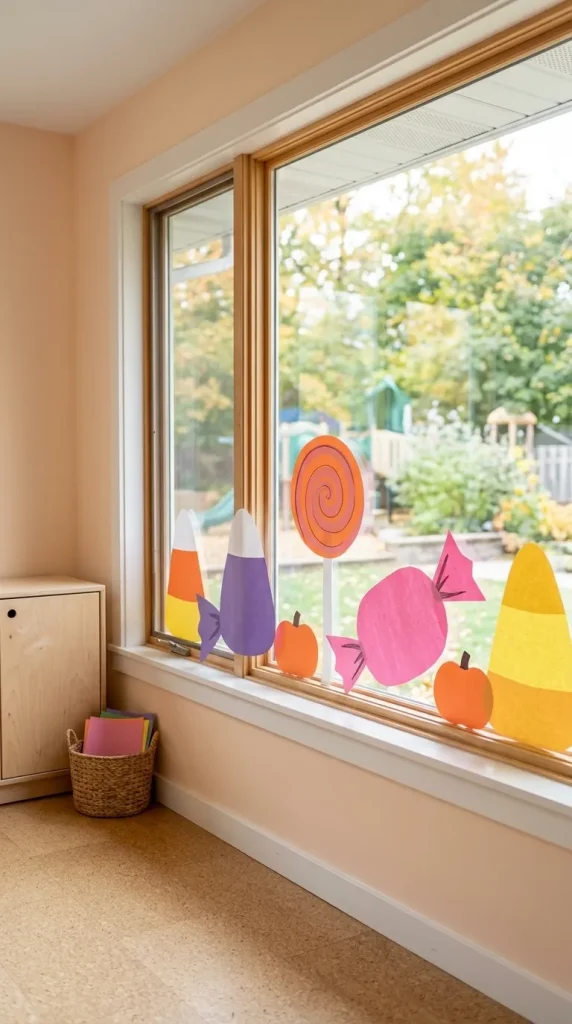
20. Make a Candy-Themed Halloween Border
For a playful alternative to ghosts and monsters, create a border of sweets.
Draw or cut candy corn, wrapped sweets, lollipops and tiny pumpkins along the bottom of the glass. Use orange, yellow, purple and pink for a brighter child-friendly palette.
Keep the individual shapes large enough that they remain recognisable from outside.
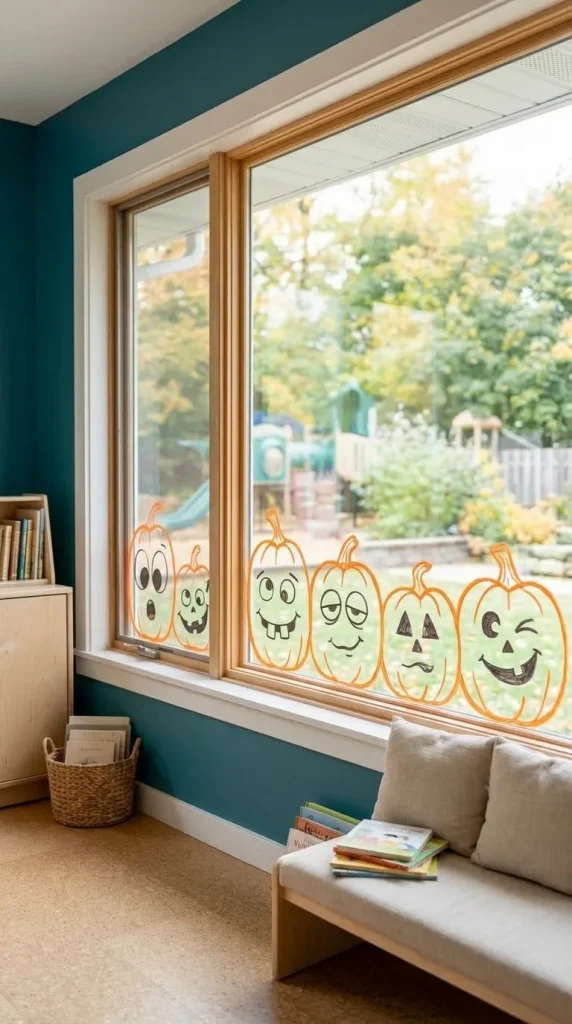
21. Draw Silly Jack-o’-Lantern Expressions
Turn a row of pumpkins into a humour-focused window display by giving each a completely different face.
Try enormous surprised eyes, tiny crooked smiles, goofy teeth or sleepy expressions. Children can suggest or design the faces before they are transferred onto the window.
This creates variety without requiring different complex motifs.

22. Make a Halloween Dog in a Ghost Costume
Pet-inspired Halloween window art offers a playful change from the usual bats and witches.
Draw a simple dog shape wearing a sheet-style ghost costume, with ears or a tail sticking out. Add a pumpkin or candy bucket beside it.
Keep the line work simple so the design feels charming rather than overly detailed.
Try Spooky and Scary Window Art
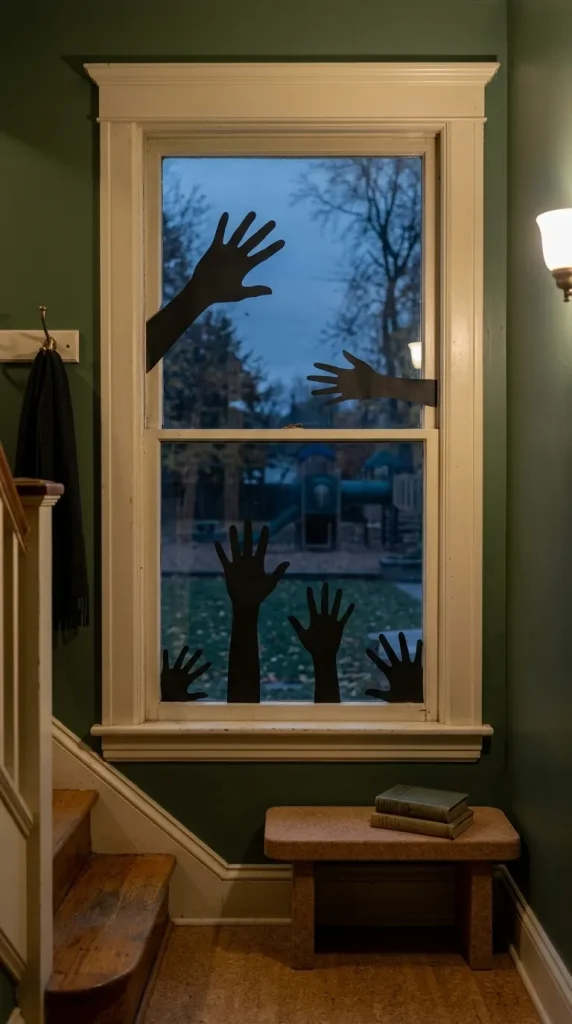
23. Create Shadowy Hands Pressed Against the Glass
Hands create a creepy effect because they make the window itself part of the scene.
Use black paper silhouettes or suitable paint to create several hands pressing inward from the edges or lower part of the window.
Vary the sizes so the arrangement feels less repetitive. Leave the centre partly clear to make the reaching shapes more dramatic.

24. Paint Simplified Zombie Silhouettes
A group of zombie silhouettes can create a darker Halloween display without requiring realistic figure drawing.
Use hunched bodies, extended arms and uneven poses to suggest the characters. Black silhouettes are especially effective because facial details are unnecessary.
Place the figures across the bottom of a wide window as though they are approaching from outside.
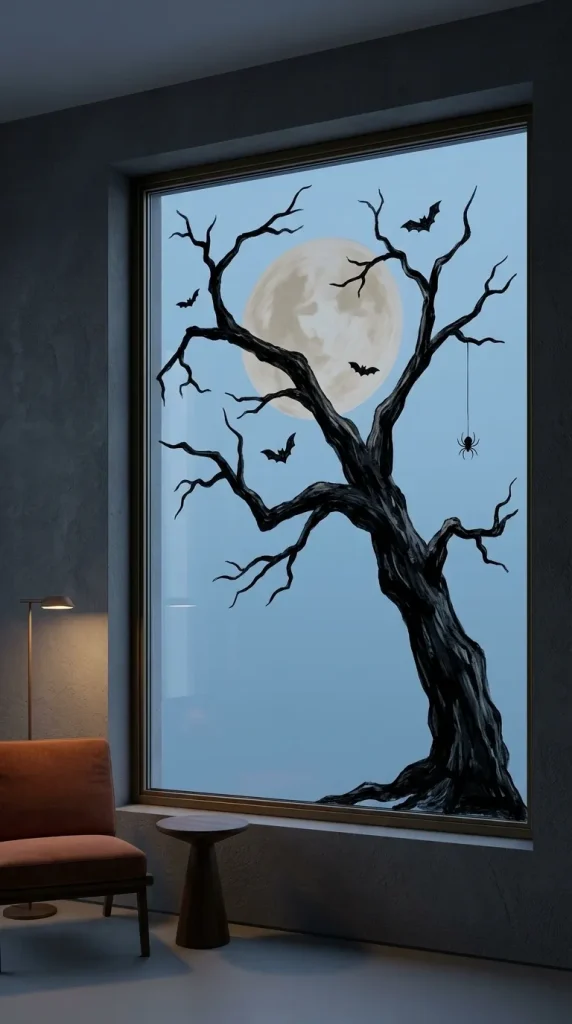
25. Draw a Creepy Crooked Tree Scene
A bare crooked tree can become the foundation of a scary Halloween composition.
Paint or draw one large black trunk extending across the glass, then add small bats, a pale moon and perhaps one hanging spider.
Because the tree itself fills much of the window, additional decorations can remain minimal.
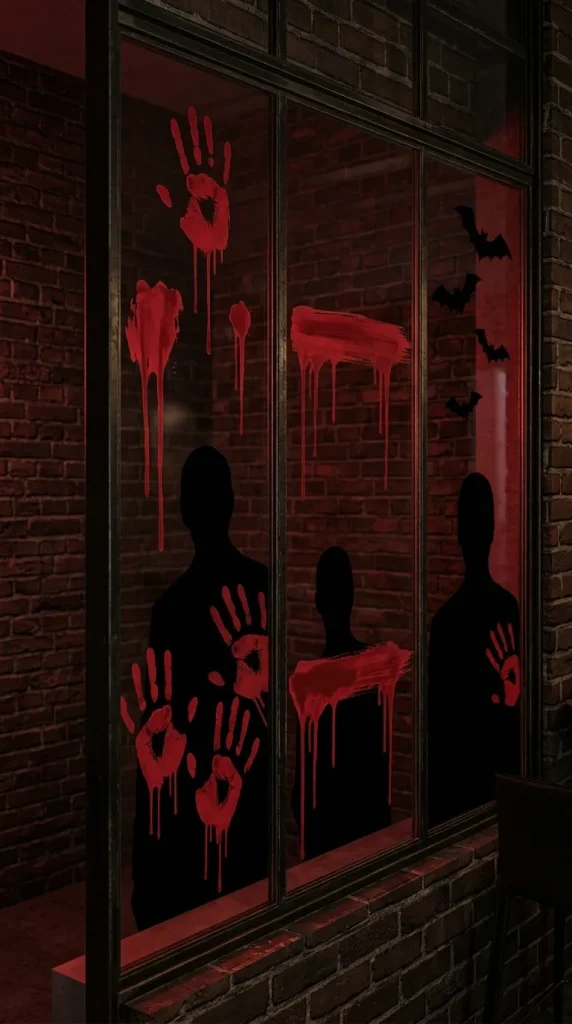
26. Create a Red-and-Black Horror Window
For a more intense adult Halloween aesthetic, restrict the entire window to red and black.
Use red handprints, dripping marks or lettering with black shadow figures or bats. The limited palette makes the composition more dramatic than a standard multicoloured Halloween design.
This direction is better suited to adult parties, bars or deliberately scary home displays than classrooms or family-facing businesses.
Create Stained-Glass-Inspired Halloween Windows
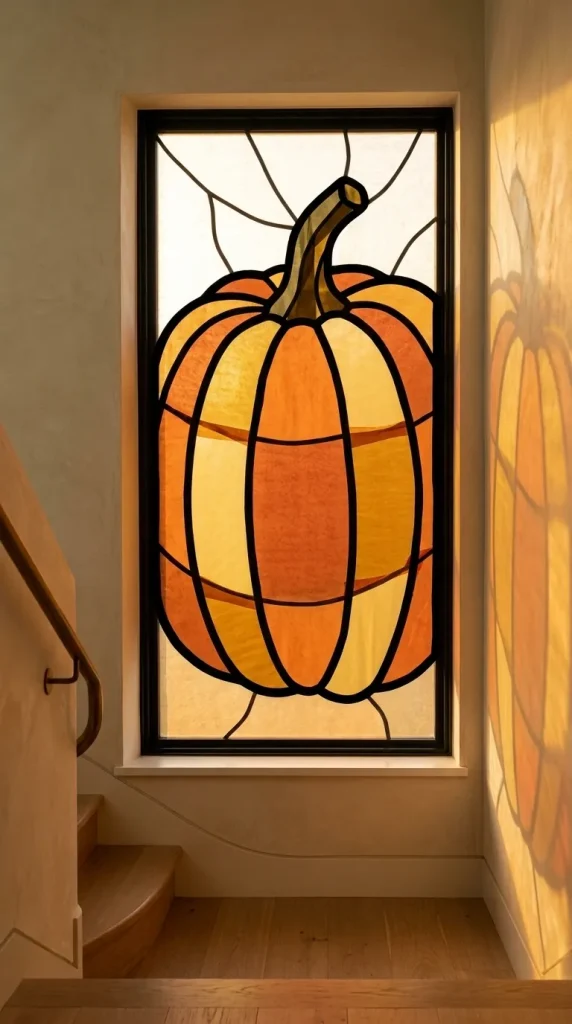
27. Make a Faux Stained-Glass Pumpkin
A pumpkin can become much more decorative when broken into stained-glass-style sections.
Create a thick black outline, then divide the pumpkin into smaller curved areas. Fill those areas with orange, amber and yellow using translucent paper or materials intended for temporary window decoration.
The black lines provide enough structure to make even simple colour sections look elaborate.
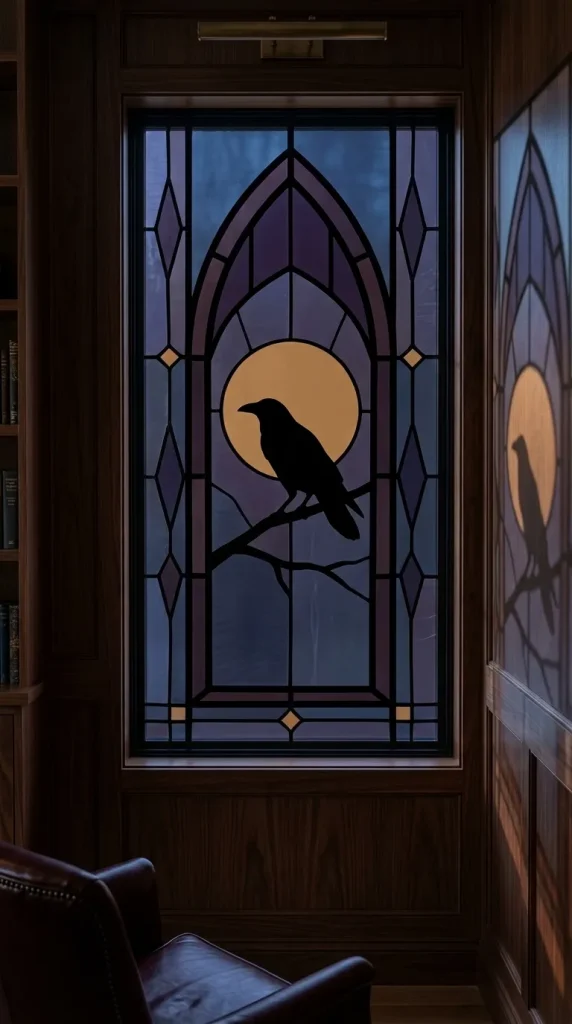
28. Create a Gothic Moon-and-Raven Window
For a more sophisticated stained-glass-inspired look, create a pointed arch filled with a moon, raven silhouette and decorative border.
Use deep purple, blue, black and muted amber rather than bright traditional Halloween colours.
Symmetry can make the design feel more architectural and deliberate, especially on tall windows.
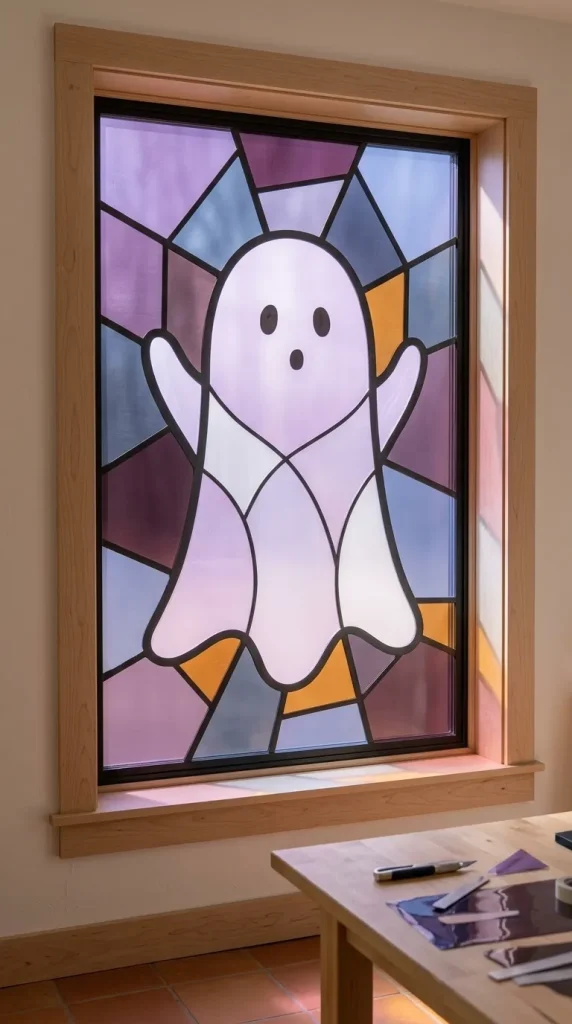
29. Build a Stained-Glass Ghost Window
Ghosts can also work within a faux stained-glass design.
Use thick dark outlines around a large white or pale-lilac ghost, then surround it with smaller sections of purple, blue and orange.
This combines a beginner-friendly motif with a more decorative technique, making it a good intermediate project.
Explore Retro, Vintage and Alternative Styles
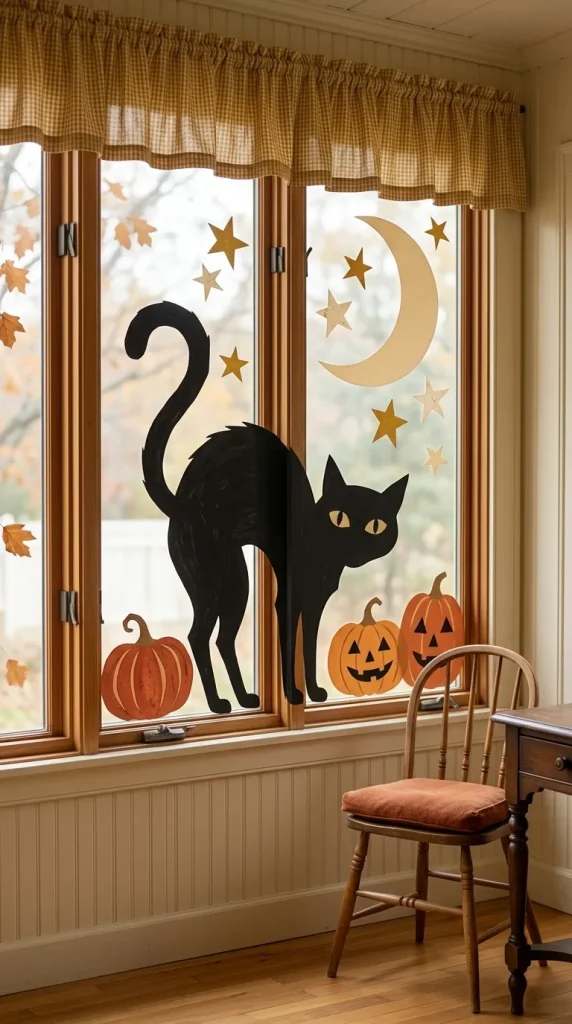
30. Create a Vintage Black-Cat-and-Moon Window
Vintage Halloween imagery often relies on simple flat shapes and a restricted palette.
Use black cats, crescent moons, stars and old-fashioned pumpkins in faded orange, cream, mustard and black.
Keep the shapes stylised rather than realistic. The limited colours make the window feel intentionally nostalgic rather than simply old-fashioned.

31. Paint a Retro Jack-o’-Lantern Border
Old-fashioned pumpkin faces can create a strong vintage Halloween atmosphere.
Paint several orange jack-o’-lanterns with exaggerated triangular eyes and wide black smiles. Add cream stars and small black cats between them.
The repeated border works especially well along long front windows.
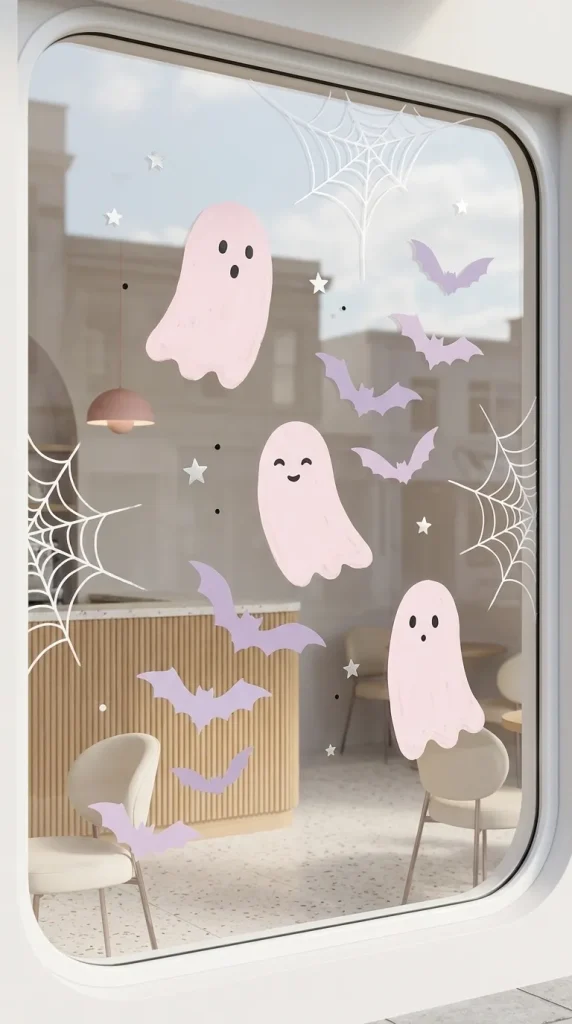
32. Create a Pastel Pink-and-Lilac Halloween Window
Halloween artwork does not need to use orange, black and green.
Use pale pink ghosts, lilac bats, white spider webs and black details for a softer playful window. A few silver or star shapes can add contrast.
This works especially well for cafés, bedrooms or anyone who prefers a lighter Halloween aesthetic.
Build Complete Window Displays
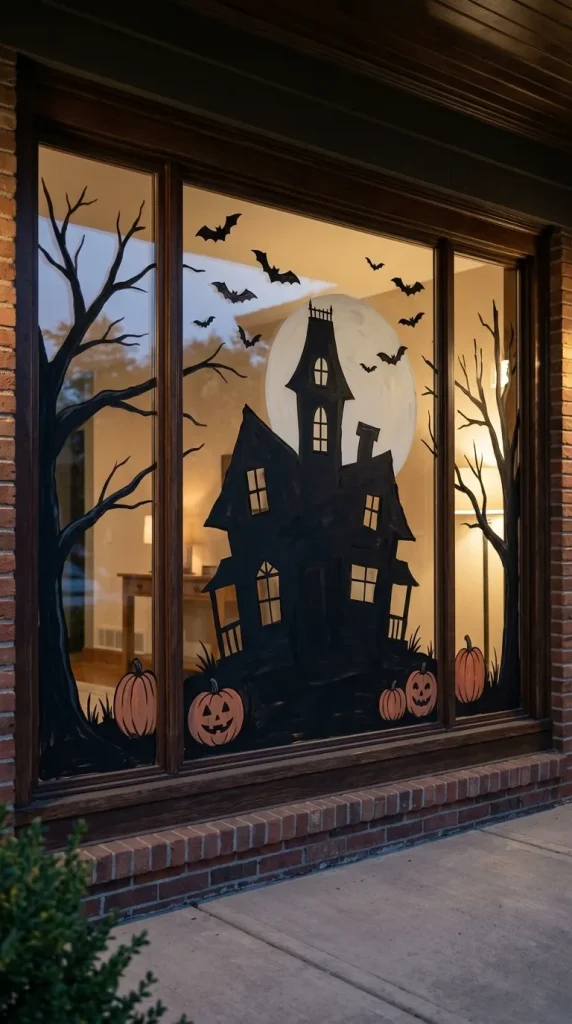
33. Paint a Full Haunted-House Scene Across a Wide Window
A large front window offers enough space for a complete visual story.
Place a haunted house as the central feature, add a pale moon behind it and create bat silhouettes across the upper glass. Bare trees can frame the sides, while pumpkins sit along the lower edge.
Work from the largest shapes to the smallest details. Leaving clear glass between major elements makes the composition easier to understand from outside.
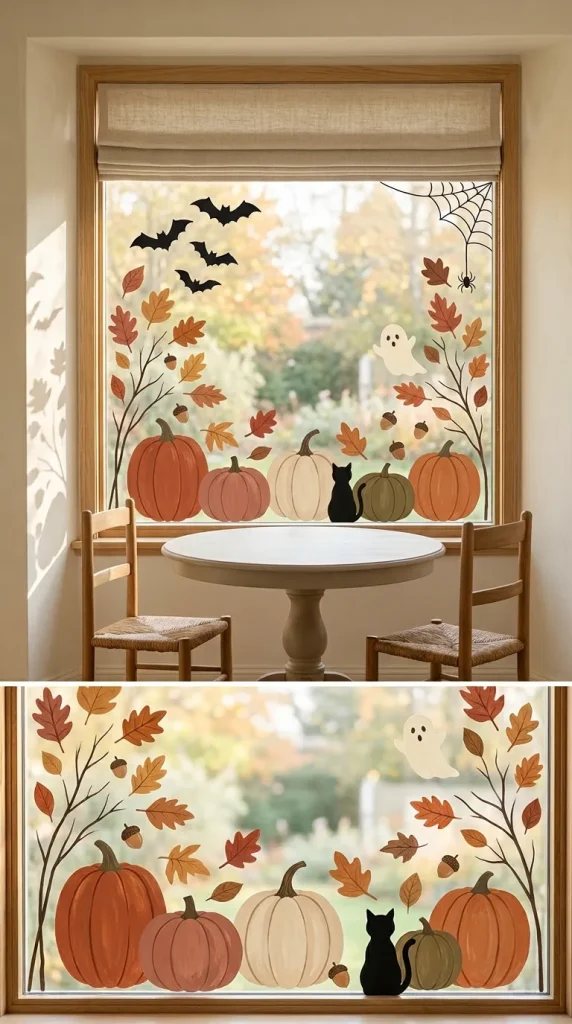
34. Create a Fall-to-Halloween Window That Evolves Through the Season
A transitional display can stay in place for much longer than a strictly spooky design.
Begin with pumpkins, autumn leaves, branches and acorns. As Halloween approaches, add bats, ghosts, spider webs or a black cat.
Keeping the base design seasonal rather than frightening allows the window to work from early autumn through Halloween.
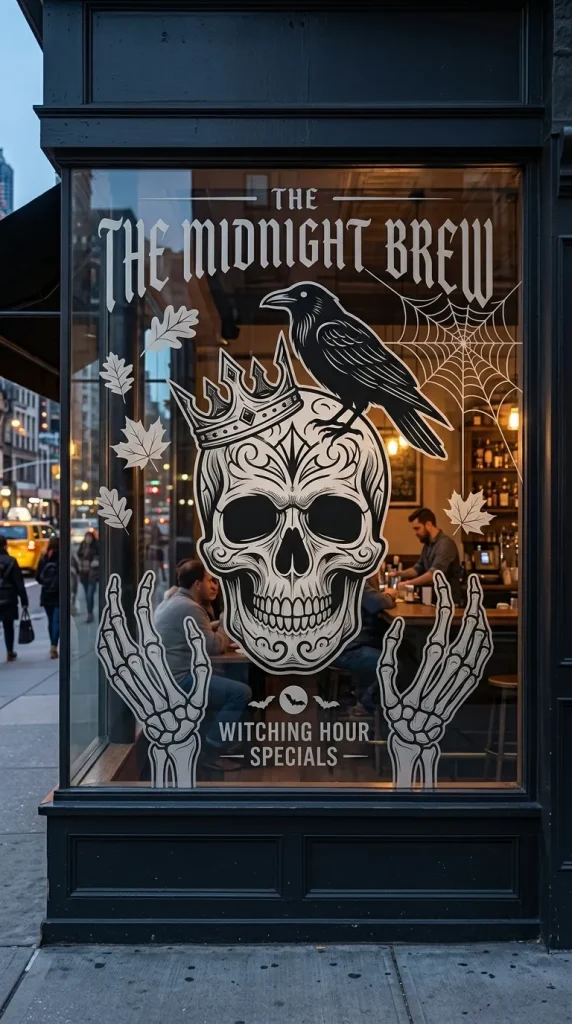
35. Design a Storefront Halloween Window With One Strong Focal Scene
A business window needs to be readable quickly from the street.
Choose one large visual anchor, such as an oversized ghost, pumpkin, witch or haunted house, and use smaller motifs as supporting details. Leave clear glass around the design so the display does not obscure the entire storefront.
A café might use a ghost holding a mug or a bubbling cauldron beside playful lettering, while a darker venue could use skulls, black cats or skeletal hands.
The strongest storefront windows prioritise scale and hierarchy rather than covering every available section of glass.
Which Halloween Window Art Method Should You Choose?
Different techniques suit different skill levels, windows and audiences.
| Method | Best for | Skill level | Overall effect |
|---|---|---|---|
| Chalk markers | Ghosts, webs, line art, lettering | Beginner | Crisp and temporary |
| Window-safe paint | Larger scenes and filled shapes | Beginner to advanced | Bold and colourful |
| Black paper silhouettes | Bats, witches, cats, houses | Beginner | Dramatic and graphic |
| Tissue paper | Kids’ crafts and faux stained glass | Beginner | Bright and translucent |
| Stencils | Repeating bats, pumpkins and ghosts | Beginner | Consistent and polished |
| Tracing templates | Detailed outlines without freehand drawing | Beginner | Clean and controlled |
| Sticky notes | Large windows and pixel designs | Beginner | Graphic and playful |
| Layered stained-glass craft | Decorative pumpkins, moons and gothic designs | Intermediate | Detailed and luminous |
How to Plan Halloween Window Art Before You Start
Begin by looking at the window from both inside and outside.
A design that looks detailed from one metre away may become unreadable from the street. Large shapes, strong contrast and clear silhouettes usually work best for windows viewed from outdoors.
Sketch the basic composition before applying anything to the glass. Decide where the main focal point will sit and how much clear space you want around it. For large windows, establish the biggest shapes first and add smaller details only after the main composition works.
Window architecture can also become part of the design. A tall pane can hold a witch or skeleton, while a wide pane works better for a haunted-house skyline. Multi-pane windows can contain individual characters or one scene extending across several sections.
How to Make Halloween Window Art Visible From Outside
Contrast becomes particularly important when the artwork is intended for people outside the building.
Black silhouettes often appear strongest when there is a lighter interior behind them. White drawings may become more noticeable against darkness in the evening.
Interior lamps can help illuminate a paper silhouette from behind, while translucent tissue-paper and faux stained-glass projects become especially attractive when daylight or suitable interior lighting passes through them.
Check the display after dark as well as during the day. The appearance can change dramatically.
How to Keep Temporary Window Art Easier to Remove
Choose materials specifically suited to temporary glass decoration if you intend to remove the artwork after Halloween.
Do not assume that every acrylic paint, chalk marker or paint pen behaves the same way. Check the manufacturer’s instructions for the exact product and confirm that it is recommended for the type of glass you have.
Specialty, tinted or coated windows may require extra caution. Test a small inconspicuous area before creating a large design.
When removing the artwork, follow the product’s cleaning instructions rather than scraping aggressively, which could damage certain glass surfaces or coatings.
Common Halloween Window Art Mistakes
Making every detail too small. Windows are often viewed from outside, so simple large shapes usually have more impact than tiny drawings.
Covering every part of the glass. Negative space helps the major shapes remain readable and can preserve some visibility through the window.
Choosing the wrong material for the surface. Check whether the marker or paint is intended for glass and temporary use before applying it.
Ignoring lighting. A silhouette that looks weak during the day may become dramatic at night, while some pale drawings may almost disappear against a bright interior.
Using the same scale everywhere. Mix one or two larger focal elements with smaller supporting details.
Making children’s windows too scary. Daycares, preschools and family-facing spaces generally work better with cheerful ghosts, pumpkins and monsters than disturbing horror imagery.
Frequently Asked Questions
What is the easiest Halloween window art idea?
White chalk-marker ghosts, black paper bats and simple jack-o’-lantern faces are among the easiest options. They rely on recognisable basic shapes and do not require advanced drawing ability.
What can I use to draw Halloween designs on windows?
Products specifically labelled for temporary glass or non-porous surfaces are the best starting point. Chalk markers and temporary window paints are commonly used, but always check the manufacturer’s instructions and test the product when appropriate.
How can I make Halloween window art without painting the glass?
Use black paper silhouettes, tissue-paper crafts, removable stencils, sticky-note pixel art or designs created on transparent backing materials and positioned against the window.
What Halloween window designs are good for kids?
Friendly ghosts, smiling pumpkins, candy, bats, colourful monsters and tissue-paper stained-glass projects are all accessible options. Toddlers and preschoolers generally benefit from large, simple shapes and supervised low-mess crafts.
What looks best on a large front window?
Oversized haunted houses, large ghosts, witches, bat swarms, giant spider webs and horizontal Halloween scenes work particularly well because they remain visible from farther away.
Make the Window Part of the Halloween Decoration
The best Halloween window art ideas use the glass itself as part of the composition.
A spider web naturally grows from a corner. A ghost can appear to rise from the bottom edge. Bats can fly across several panes, while a haunted-house silhouette can stretch horizontally across a large front window.
You also do not need professional drawing skills to create a strong result. Templates, stencils, paper silhouettes and repeated simple shapes can produce displays that look impressive from the street while remaining manageable for beginners.
Choose the method according to the audience, window size and atmosphere you want. Cute chalk ghosts may be perfect for a classroom, while a black haunted-house silhouette can transform a front window and a detailed faux stained-glass design can become an artistic focal point.
When scale, contrast and placement are planned carefully, even very simple Halloween window art can completely change the way a home or business looks for the season.